This step-by-step guide will show you how to test the quality of your aquarium water. It is important to know this information because it can help determine what fish and plants you should keep in the tank, as well as other aspects of maintaining a healthy environment and reducing fish stress.
The most consistent way to test aquarium water is by using a liquid test kit. These tests provide accurate results, measured in either degrees of hardness or parts-per-million. You can also use test strips or bring a water sample to your local fish store.
After reading this guide, you will be able to confidently take an accurate measurement of your water’s pH level, hardness, ammonia, nitrite and nitrate with just a few simple tools.
Contents
- 1 What types of aquarium water testing kits are available for home use?
- 2 Which water parameters are usually tested?
- 3 What is the difference between liquid tests and test strips?
- 4 Are there any advantages to using one type of testing over the other?
- 5 Should I test my tank water or tap water?
- 6 How to test your water parameters with liquid test kits
- 7 How to test your water parameters using test strips
- 8 How to test your water parameters at a local pet store
- 9 Which is the best aquarium test kit?
- 10 How accurate are aquarium test kits?
- 11 How often should I use an aquarium test kit?
What types of aquarium water testing kits are available for home use?
Liquid test kits
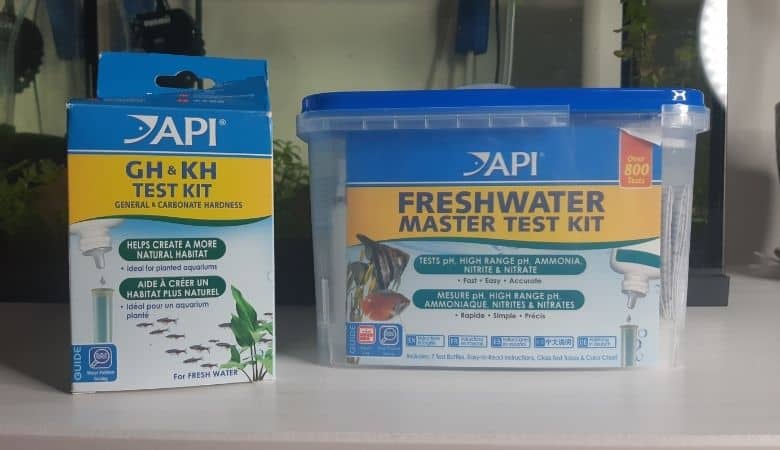
The most recommended brand is the API Master Test Kit, which can be purchased on Amazon or from your local fish store for around $25 USD.
This test kit comes in freshwater, saltwater and reef versions, depending on your tank setup.
It contains 7 total testing bottles that test for pH, ammonia, nitrite and nitrate. Some of the water parameters require two test bottles.
API claims that the test kit provides you with more than 800 total tests, which I believe is accurate if you include each water parameter test separately.
I conducted approximately 90 tests on each of my ammonia, nitrite, nitrate and pH before my nitrate bottles ran out. The two nitrate bottles are used up more quickly because they require 10 drops each per test, while the other tests require fewer drops.
Instead of buying an entirely new test kit, you can buy separately sold nitrate test bottles as replacements when they run out.
I tested my water much more frequently when I was first setting my tank up to see how it was progressing through the nitrogen cycle. Once the cycle was completed and my fish were added, my testing frequency was reduced to once or twice per week.
I believe the liquid test kit is the most economical method for testing your aquarium water parameters.
Testing strips
Testing strips are pieces of narrow paper, about 3 inches in length, that usually have multiple water parameter testing pads attached to them.
To conduct the test you simply swirl the testing paper in your tank a few times and let them dry with the pads facing up.
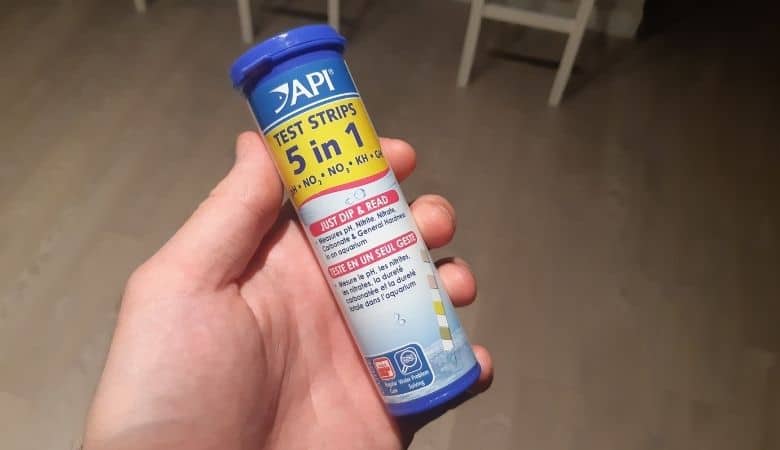
API sells a 5-in-1 testing strip product that tests for nitrite, nitrate, pH, carbonate hardness (KH), and general hardness (GH). These are sold for approximately $10 USD and contain 25 test strips.
Separate strips are sold for testing ammonia.
Other brands, such as Aqua Care Pro, sell 6-in-1 test strips for around $15 USD that test for HK, GH, pH, nitrite, nitrate and chlorine. This product contains 116 total test strips.
Local fish store tests
Your local fish specialty store, and most franchise pet stores, will test your aquarium water parameters for you if you bring in a water sample from your fish tank. Sometimes they will even run the tests for free.
Testing meters
You can purchase digital pH testing meters for around $15 USD. This is the most precise and economical way to test for pH.
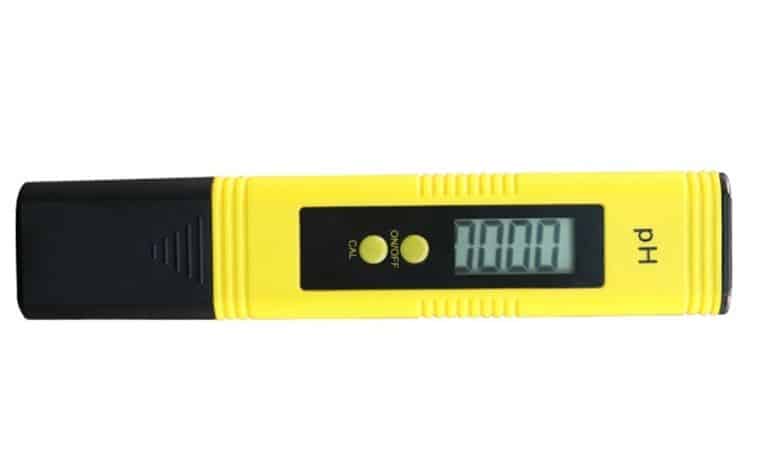
The other water parameters are not able to be tested using this method though.
Which water parameters are usually tested?
You can buy liquid test kits that can measure many water parameters. However, 6 primary tests are most important for the fishkeeping hobby:
- Ammonia
- Nitrite
- Nitrate
- pH
- Carbonate hardness (KH)
- General hardness (GH)
You may discover other tests that measure phosphate, copper and oxygen levels, among other things. But these are uncommon for most hobbyists and less important to test frequently in freshwater aquariums.
Another less common test may measure alkalinity, which is similar to KH.
What is the difference between liquid tests and test strips?
Liquid tests require you to fill a vial with aquarium water, add drops of testing solution, shake and wait for a few minutes. These can only test one water parameter at a time.
Test strips require you to dip and swirl a piece of testing paper in your aquarium for a few seconds and usually wait 30 seconds to one minute. These often have multiple test pads, which allow you to measure multiple parameters at once.
There is debate among fishkeepers about which testing method is most effective. Each has its pros and cons:
Are there any advantages to using one type of testing over the other?
Each testing method has advantages and disadvantages. Most fish keepers would agree that liquid test kits produce more consistent results and are the preferred testing method.
However, many people swear by test strips for their convenience and ease of use.
| Liquid tests | Test stips |
|---|---|
| Pros: + Very accurate if administered correctly + Easier to read + Lasts longer | Pros: + Easy to administer + Less chance of error from incorrect testing technique + Can test multiple parameters at once |
| Cons: – Time-consuming – Less expensive per test – Dealing with corrosive liquids | Cons: – Difficult to read due to small test pad area – More expensive per test |
Should I test my tank water or tap water?
It’s more important to test your aquarium water, especially if you’re keeping fish in it. But it’s recommended to regularly test your tap water as well to verify its pH, water hardness, and other parameters.
Although unlikely, it’s also possible that your water contains a trace amount of ammonia, nitrite or nitrate, which would be important to remove before adding to your fish tank.
How to test your water parameters with liquid test kits
The API liquid tests require you to add drops of testing solution into glass test tubes with 5ml of tank water.
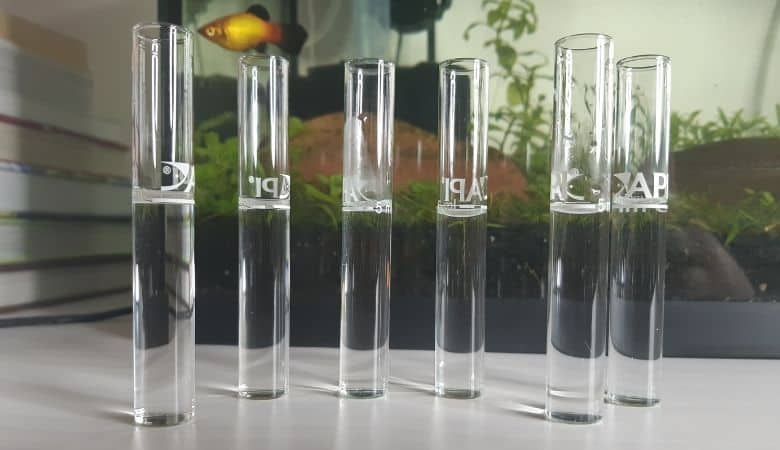
Each test requires a different number of drops so make sure to follow your test’s instructions carefully.
After adding the drops you add the cap and shake the liquid for a specified amount of time.
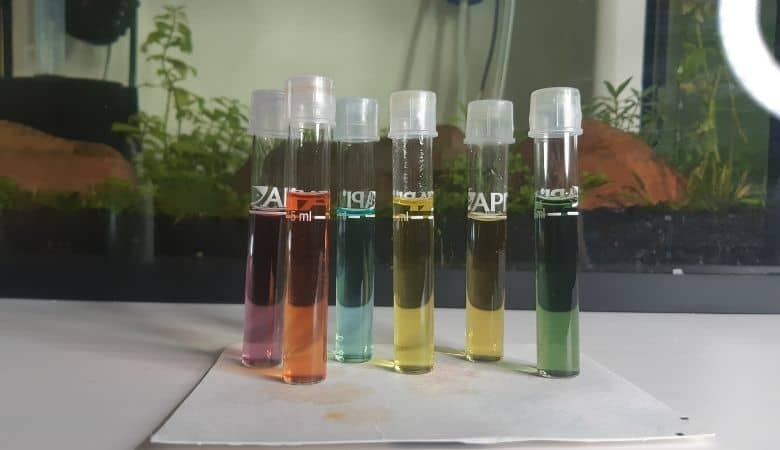
When the test is complete, the liquid will change color and can be compared against a color chart for the corresponding parameter. These tests usually provide the concentration of what you’re testing for in parts-per-million (ppm).

Except for the pH test which measures the pH value, which represents the concentration of hydrogen ions.
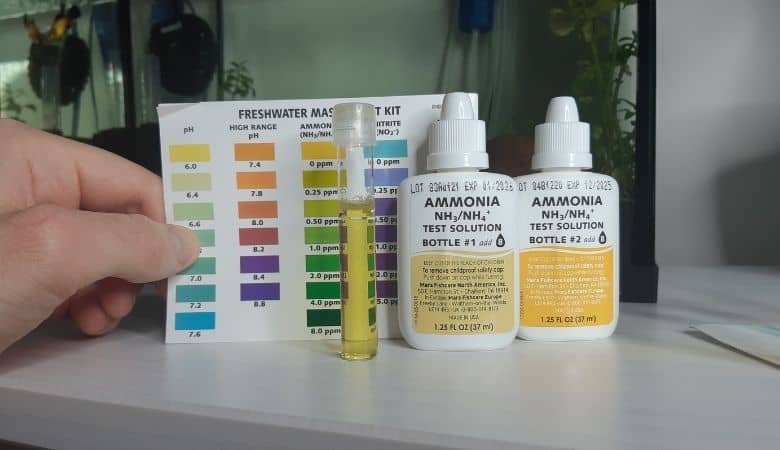
Testing for ammonia
The ammonia color scale measures the concentration of ammonia from 0.0-8.0ppm.
Here is the ammonia testing procedure:
- Fill one glass vial with 5ml of aquarium water.
- Shake ammonia testing bottle #1 for 5 seconds.
- While holding the ammonia testing bottle #1 completely upsidedown, squeeze 8 drops into the vial.
- Cap the vial and shake vigorously for 5 seconds.
- Shake ammonia testing bottle #2 for 5 seconds.
- While holding the ammonia testing bottle #2 completely upsidedown, squeeze 8 drops into the vial.
- Cap the vial and shake vigorously for 5 seconds.
- Wait for 5 minutes and then measure against the color scale.
Testing for nitrite
The nitrite color scale measures the concentration of nitrite from 0.0-5.0ppm.
Here is the nitrite testing procedure:
- Fill one glass vial with 5ml of aquarium water.
- Shake nitrite testing bottle for 5 seconds.
- While holding the nitrite testing bottle completely upsidedown, squeeze 5 drops into the vial.
- Cap the vial and shake vigorously for 5 seconds.
- Wait for 5 minutes and then measure against the color scale.

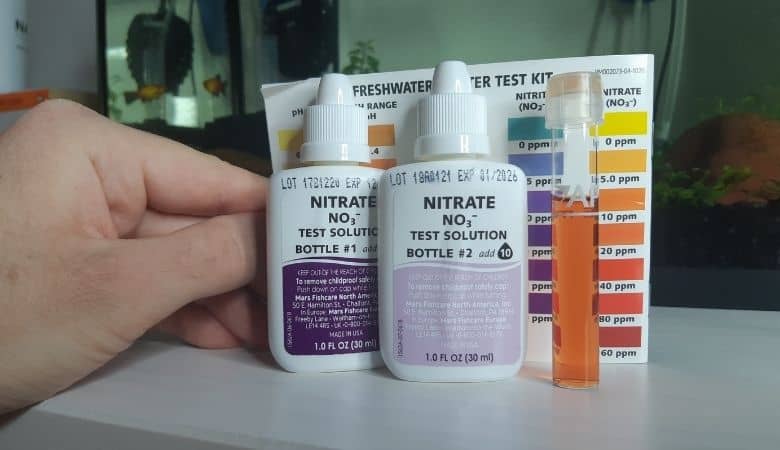
Testing for nitrate
The nitrate color scale measures the concentration of nitrate from 0.0-160.0ppm.
Here is the nitrate testing procedure:
- Fill one glass vial with 5ml of aquarium water.
- Shake nitrate testing bottle #1 for 5 seconds.
- While holding the nitrate testing bottle #1 completely upsidedown, squeeze 10 drops into the vial.
- Cap the vial and shake vigorously for 5 seconds.
- Shake nitrate testing bottle #2 for 30 seconds (important!).
- While holding the nitrate testing bottle #2 completely upsidedown, squeeze 10 drops into the vial.
- Cap the vial and shake vigorously for 60 seconds.
- Wait for 5 minutes and then measure against the color scale.
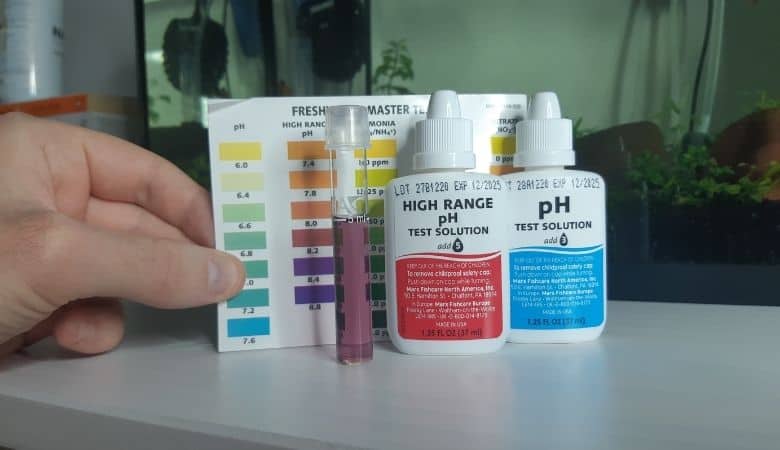
Testing for pH
There are two pH testing bottles. The “low range” test measures from 6.0-7.6 pH and the “high range” test measures from 7.4-8.6 pH.
Test first with the low-range bottle. If you measure a pH of 7.6 then conduct another test with a fresh water sample using the high-range pH bottle.
Here is the pH testing procedure:
- Fill one glass vial with 5ml of aquarium water.
- Shake pH testing bottle for 5 seconds.
- While holding the pH testing bottle completely upsidedown, squeeze 5 drops into the vial.
- Cap the vial and shake vigorously for 5 seconds.
- Wait for 30 seconds and then measure against the color scale.
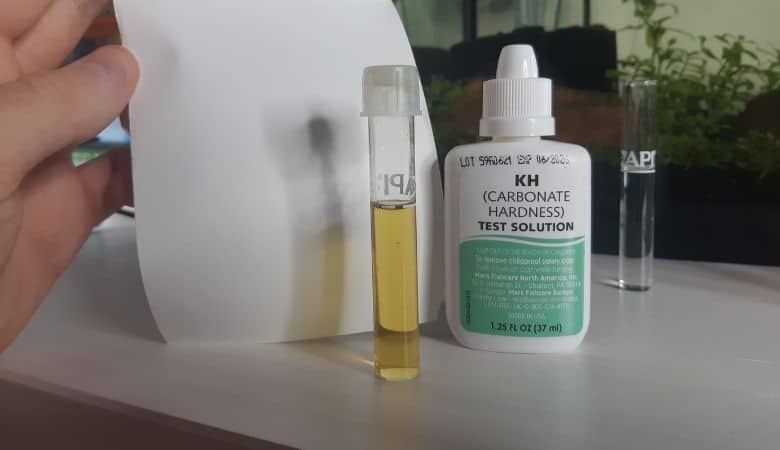
Testing for carbonate hardness (KH)
The KH test measures the concentration of carbonate and bicarbonates in your water. This test must be conducted one drop at a time.
Here is the KH testing procedure:
- Fill one glass vial with 5ml of aquarium water.
- Shake KH testing bottle for 5 seconds.
- While holding the KH testing bottle completely upsidedown, squeeze 1 drop into the vial.
- Cap the vial and invert several times to mix the solution. At first, your solution will turn blue in color.
- Remove the cap and add another 1 drop into the vial. Keep count of the number of drops you add.
- Cap the vial and invert several times to mix the solution. Continue adding one drop and inverting each time until the liquid turns from blue to yellow.
- The number of drops required to turn the solution yellow is the degrees of KH, or dKH. Compare your dHK against the chart below to see what your KH concentration is in parts-per-million.

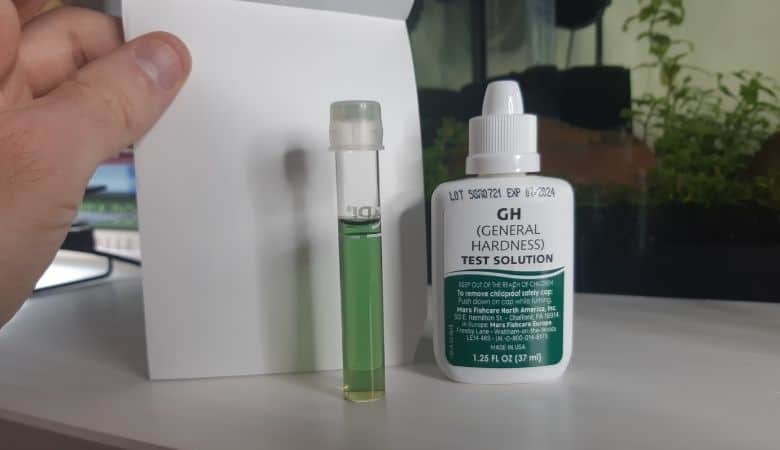
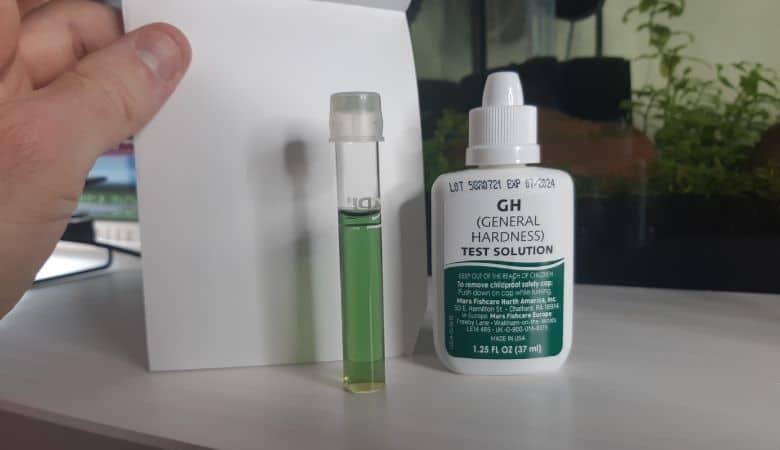
Testing for general hardness (GH)
The GH test measures the concentration of calcium and magnesium ions in your water. This test must be conducted one drop at a time like the KH test.
Here is the GH testing procedure:
- Fill one glass vial with 5ml of aquarium water.
- Shake GH testing bottle for 5 seconds.
- While holding the GH testing bottle completely upsidedown, squeeze 1 drop into the vial.
- Cap the vial and invert several times to mix the solution. At first, your solution will turn red in color.
- Remove the cap and add another 1 drop into the vial. Keep count of the number of drops you add.
- Cap the vial and invert several times to mix the solution. Continue adding one drop and inverting each time until the liquid turns from red to green.
- The number of drops required to turn the solution green is the degrees of GH, or dGH. Compare your dGK against the chart below to see what your KH concentration is in parts-per-million.
How to test your water parameters using test strips
Most test strips simply require you to submerge the test strip directly into your aquarium and swirl in a circle three times.
When you remove the strip from the water, do not shake the excess water off. Keep the testing pads facing upwards and place the strip on a flat surface for 30 seconds.
Then compare the testing pads against the corresponding color scale provided with your test strip packaging.
How to test your water parameters at a local pet store
Call your local pet store to confirm if they can test your water and to verify which parameters they can test. It’s useful to test your water’s ammonia, nitrite, nitrate, pH, KH and GH levels as a base.
Many stores offer free tests but it’s worth asking on the phone.
Also, confirm with the store attendant that they provide test result numbers. Some stores simply say your water is good, but don’t provide numbers.
Bring a water sample of at least 200ml in a plastic bag or Tupperware container. Consider asking how they perform their tests. Liquid tests are generally more consistent than test strips.
Which is the best aquarium test kit?
API Master Test Kit is affordable and easy to use and precise enough to give any novice an overall insight into what is happening in their tank. It contains tests for ammonia, nitrite, nitrate, low-end pH (6.0-7.6 pH), and high-end pH (7.4-8.5 pH).
The low-end pH, high-end pH and nitrite tests require individual bottles. The ammonia and nitrate tests require drops from two bottles each to complete the test. So there are 7 total testing bottles in the test kit.
The API Test Kit is available in four types: freshwater, saltwater, reefs and ponds, depending on the type of aquarium you have.
You can also buy an API GH and KH test kit that contains a liquid test bottle for testing the carbonate hardness and general hardness of your freshwater fish tank.
If you run out of an individual tester kit, you can buy individual refills. In my experience, you will run out of the nitrate test bottles more quickly than the others because they require 10 drops per test, while the others require fewer drops.
All of the test bottles have the same liquid volume.
How accurate are aquarium test kits?
Liquid test kits are very accurate as long as you administer the test correctly. There is a margin for error if you do not accurately measure 5ml of water into your testing vial, or add the wrong number of testing drops, or do not adequately shake the testing bottles.
There is some debate as to whether or not testing strips are as accurate as liquid tests.

In my experience, the testing strips seem to produce comparable results, but have some limitations.
First of all, I find that the testing strips are more difficult to read and less precise. This is due to their small size and because each value on the color scale is only a slightly different shade.
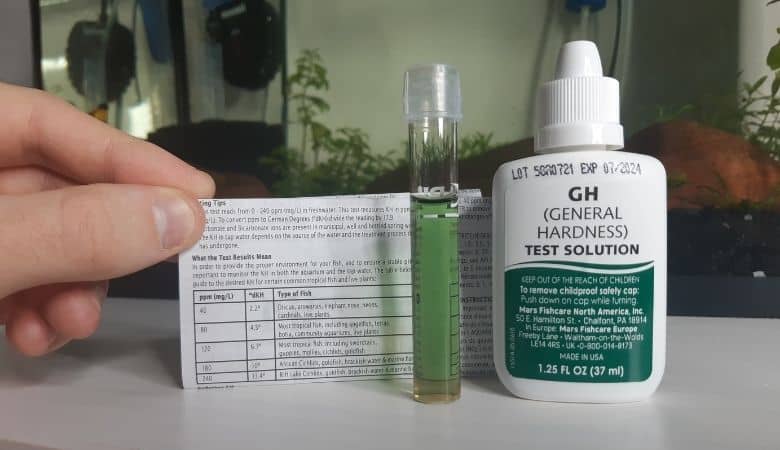
For example, in the photo above, the color of my KH testing pad is between 120-180 ppm according to the chart. That tells me my dKH is between 7-10, which is a pretty big range.
The liquid KH test gives me a more precise reading to each degree of KH.
Also, the testing strip GH does not read any higher than 180ppm, or 10 dGH. But the liquid test kit tells me my general hardness is 13 dGH, which again is quite a gap. This is particularly important if you’re keeping fish that are sensitive to hard water.
Lastly, the ammonia and nitrite test pads a little deceiving in my opinion. The chart suggests that 0ppm is a near-perfect white color. But the testing pads appear darker once they become wet, even if the water contains no ammonia or nitrite.
This can mislead you to believe your ammonia and nitrite levels are above 0ppm when they’re not.
In conclusion, I think test strips come in handy when you want to run a quick ballpark test. But I would recommend using the liquid kits when it’s important to get an accurate reading.
How often should I use an aquarium test kit?
When you start with your aquarium you should try every day and test the water to see how your fish tank is progressing through the nitrogen cycle.
Once your tank had been cycled you can reduce your testing frequency to every week or two.
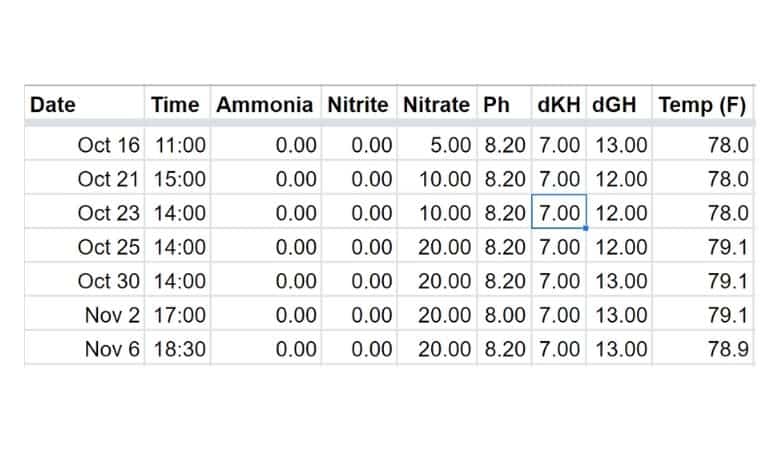
I often test more often to make sure my water parameters are on point. I also think it’s important to maintain nitrate levels between 10-20ppm, so a more frequent testing schedule allows me to more accurately maintain my water quality.
I track my tests in a spreadsheet along with observations and activities to keep a record of my aquarium history.
Of course when you notice irregularities, such as stressed fish or dying plants you should test immediately.