Low-tech planted tanks are becoming more popular are aquarist seek lower-cost and lower-maintenance methods for keeping fish. This mega-guide reveals everything you would every want to know about building and maintaining a low-tech aquarium of your own.
Contents
- 1 What is a low-tech tank?
- 2 Why would you want a low-tech aquarium?
- 3 Required equipment for low-tech tanks
- 4 Optional equipment
- 5 Equipment that is not required
- 6 Planning process when building a new low-tech tank
- 7 Low-tech aquarium plants
- 8 Tissue culture plants vs. potted plants vs. bunched plants
- 9 Where to buy aquarium plants
- 10 How to prepare your plants for planting
- 11 How to add your plants
- 12 Low-tech fertilization
- 13 How to balance your water parameters
- 14 Low-tech lighting
- 15 How many hours of lighting is required for low-tech tanks?
- 16 Low-tech tank maintenance
What is a low-tech tank?
Low-tech tanks are characterized by their lack of carbon-dioxide (CO2) injection and their use of low-medium lighting. “High-tech” setups require CO2, high lighting, more fertilization and additional maintenance, generally speaking.
CO2, lighting and fertilization is used to grow more lush plants. Some plant species cannot be grown without high-tech setups. This means that low-tech setups will provide you with fewer plant choices and slower plant growth.
However, you can certainly still grow thriving and beautiful low-tech planted aquariums with a little understanding.
Why would you want a low-tech aquarium?
Low-tech aquariums cost less due to fewer equipment requirements
The main benefits of having a low-tech tank are lower costs and slightly lower maintenance. The increased cost of a high-tech setup is driven mostly by the CO2 mechanism.
A complete CO2 system may cost between $200-$300.
Note: Despite being less expensive and requiring less equipment, low-tech tanks still need regular maintenance and care. We believe it’s important to make this clear for anyone thinking that “low-tech” means “low care.”
Deep substrate tanks require fewer water changes and maintenance
Within the category of “low-tech tanks” you will find deep substrate tanks. These tanks are characterized by having 3-inches or more of substrate depth. Usually comprised of a nutrient-rich base and capped with 1.5 to 2-inches of sand or gravel.
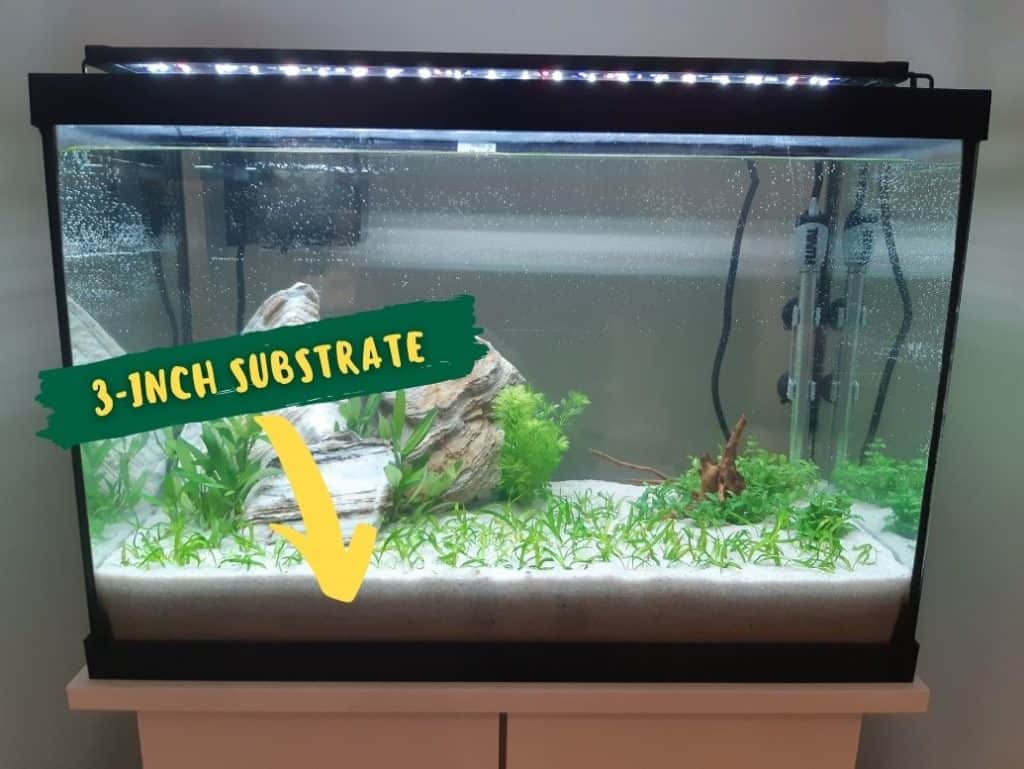
The deep substrate creates pockets that contain little to no oxygen, which allows anaerobic bacteria to populate. This type of bacteria will denitrify a tank.
In other words, it will remove nitrates, which would otherwise require regular water changes to accomplish.
While deep substrate setups can be utilized in high-tech tanks, they are generally associated with low-tech setups.
Required equipment for low-tech tanks
Shorter tanks are better for low-tech lighting
The most obvious piece of equipment is the tank itself. The tank size will mostly determine what types of fish species can be kept. Regarding plants, you can grow pretty much any species in any sized tank.
Large volume tanks will also greatly affect the total cost of your setup due to the power required for your filter and heater. Also, a larger tank will require a greater volume of substrate, hardscape and fertilization.
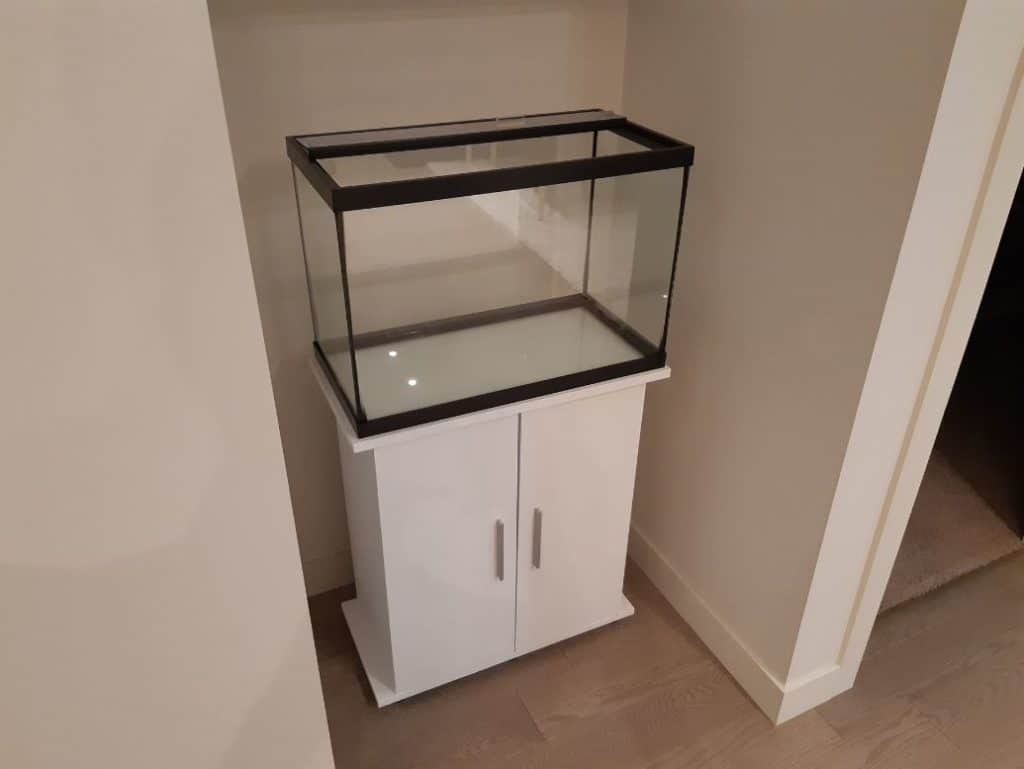
Shorter tanks may be beneficial for low-tech setups because lower-intensity lighting will be able to more effectively reach the bottom of the tank. The photosynthetic available radiation (PAR) is roughly cut in half every 6-inches of aquarium depth.
Therefore, plants in shorter tanks would receive a greater amount of light to support their growth.
You can certainly over-do it with lighting in a low-tech setup. You will likely find that many aquarium lights will be too intense for a low-tech setup and will need to be run on a lower intensity, or positioned higher above the tank.
But it’s worth thinking about if you choose to buy a tank that’s 16-inches or tall, or are considering low-end lighting.
Water conditioner to remove chlorine from tap water
Water conditioner is a liquid that is added during water changes to remove chlorine and heavy metals from your tap water. Chlorine is added in trace amounts to tap water because it kills bacteria, making it safe for human consumption.
But in our aquariums, we want to maintain colonies of beneficial bacteria as part of the nitrogen cycle. Therefore, adding water conditioner during water changes is a crucial step in maintaining a healthy aquarium.
We recommend using Seachem Prime because it’s a reliable product that not only removes chlorine, but also temporarily detoxifies ammonia and nitrite that may be present in your aquarium when it’s not fully cycled.
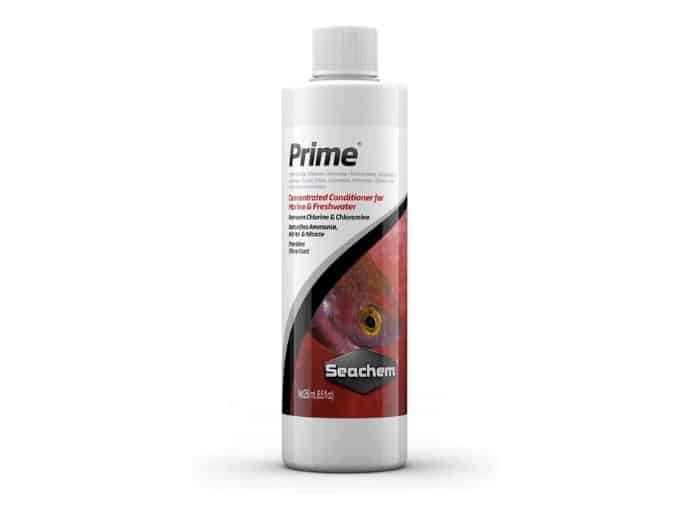
This is helpful for preventing gill burns and fish stress. It also temporarily detoxifies ammonia and nitrites that are currently present in the tank, which is a big plus.
We’ve also had success using the API brand water conditioner. However, it does not detoxify existing ammonia and nitrite.
Heater for maintaining a consistent temperature
Aquarium heaters are designed to maintain your water at a consistent temperature. This is important for freshwater tropical fish that typically thrive in 75-80 °F (24-27 °C).
This is slightly warmer than room temperature, which is why it’s best to have a heater in your aquarium at all times.
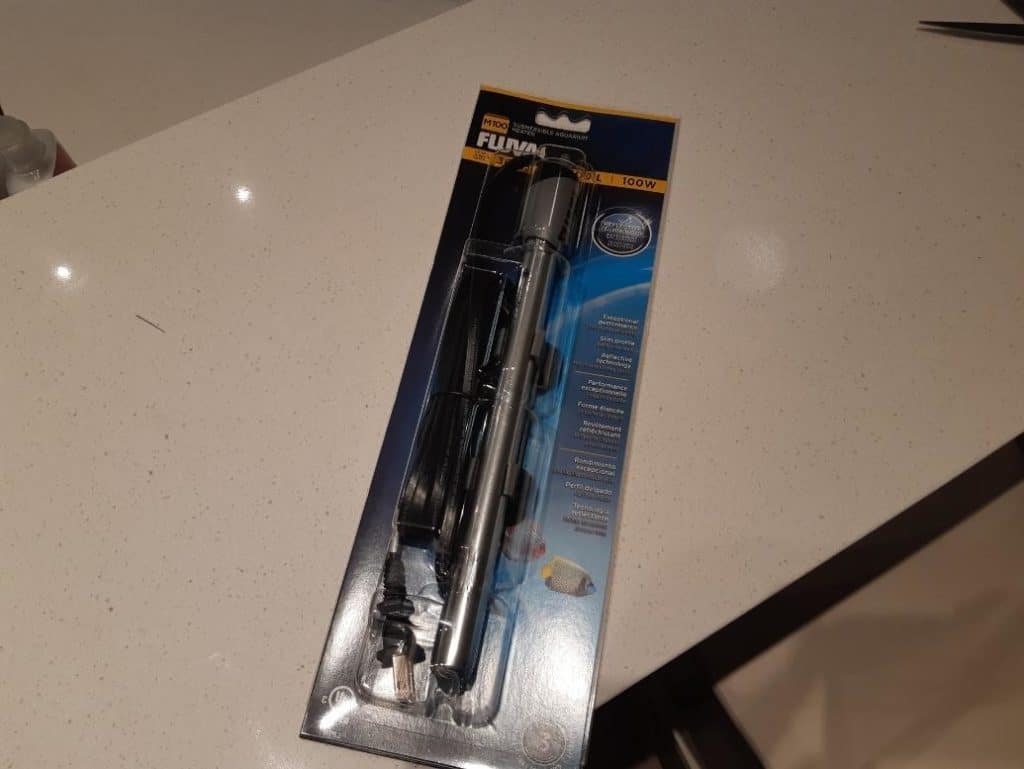
A constant temperature is beneficial for healthy plant growth as well.
The heater you choose to buy will depend on the volume of water in your tank. Use the following table to determine the power rating for your temperature based on your tank size.
| Tank volume | Heater wattage |
| 5-gallons | 25 watts |
| 10-gallons | 50 watts |
| 15-gallons | 75 watts |
| 20-gallons | 100 watts |
| 30-gallons | 150 watts |
| 50-gallons | 250 watts |
| 75-gallons | 375 watts |
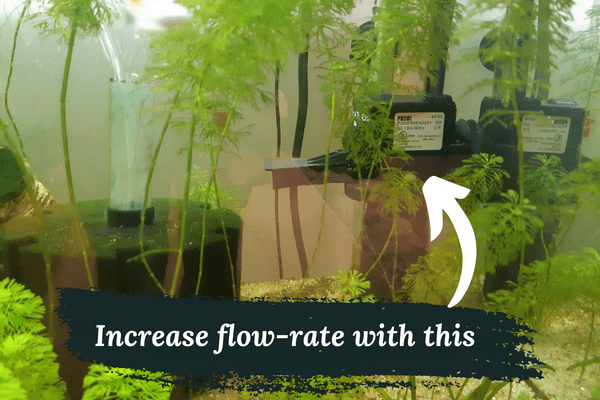
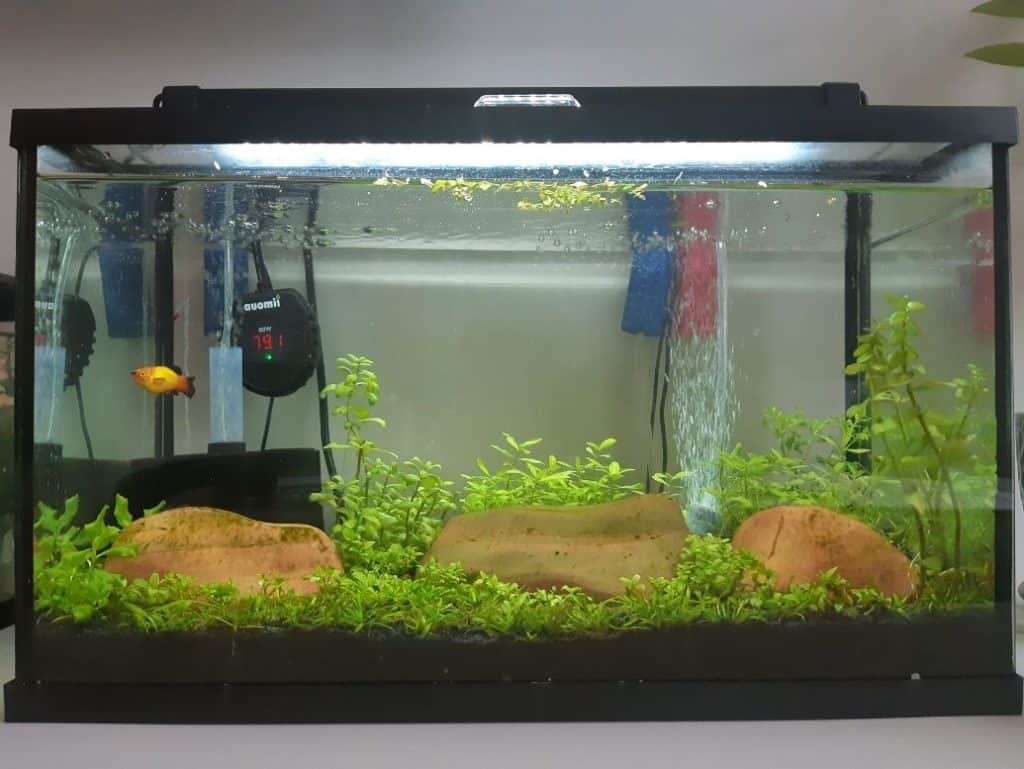
Filtration for removing plant debris
Aquarium filters collect loose debris in your tank and aerate the water with surface agitation. Filters also prevent your tank from having stagnant water, which is a significant cause of algae growth.
Low-tech and high-tech tanks do not require different filters. However, there are benefits to having a filter with a higher flow rate in some circumstances. On the other hand, too much water flow may harm certain plants and fish species.
Sponge filters
Sponge filters are a great starting point for fishkeepers because they are easy to use and inexpensive. Their ease-of-use make them a great addition for low-tech tank-keepers who want a setup that is easy to maintain and simple.
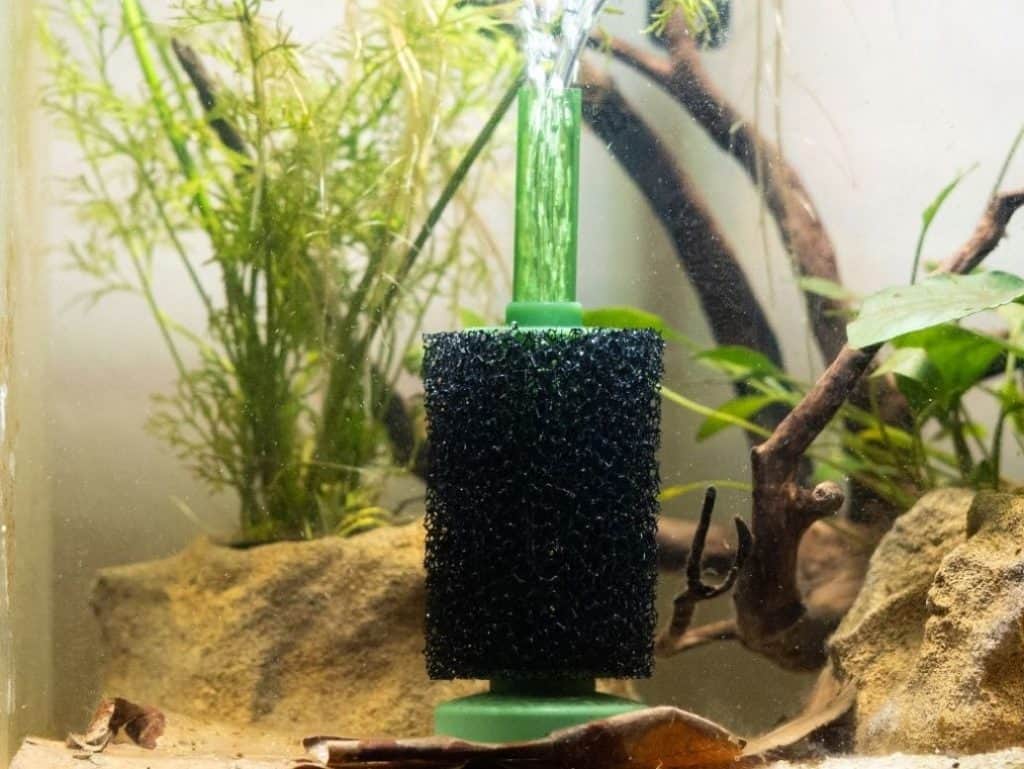
One drawback is that you cannot add chemical filtration to sponge filters. This is a form of filtration that is used to remove dissolved particles from a tank’s water.
| Pros | Cons |
| ✔️ Inexpensive ✔️ Easy to clean ✔️ Good surface agitation ✔️ Good for beneficial bacteria growth | ❌ Takes up physical tank space ❌ Cannot use chemical filtration ❌ Louder than other filtration types ❌ Can lower CO2 due to surface agitation |
Hang-on-the-back filters
Hang-on-the-back filters are another great option for low-tech tanks because they’re easy to use and cost effective. The biggest advantage over sponge filters is that they can be customized with filter media.
In other words, you can add different types of filtration materials inside your filter to remove varying sizes of debris.
You can also add something like activated carbon to remove dissolved solids, which is useful for removing medication after treating fish illness.
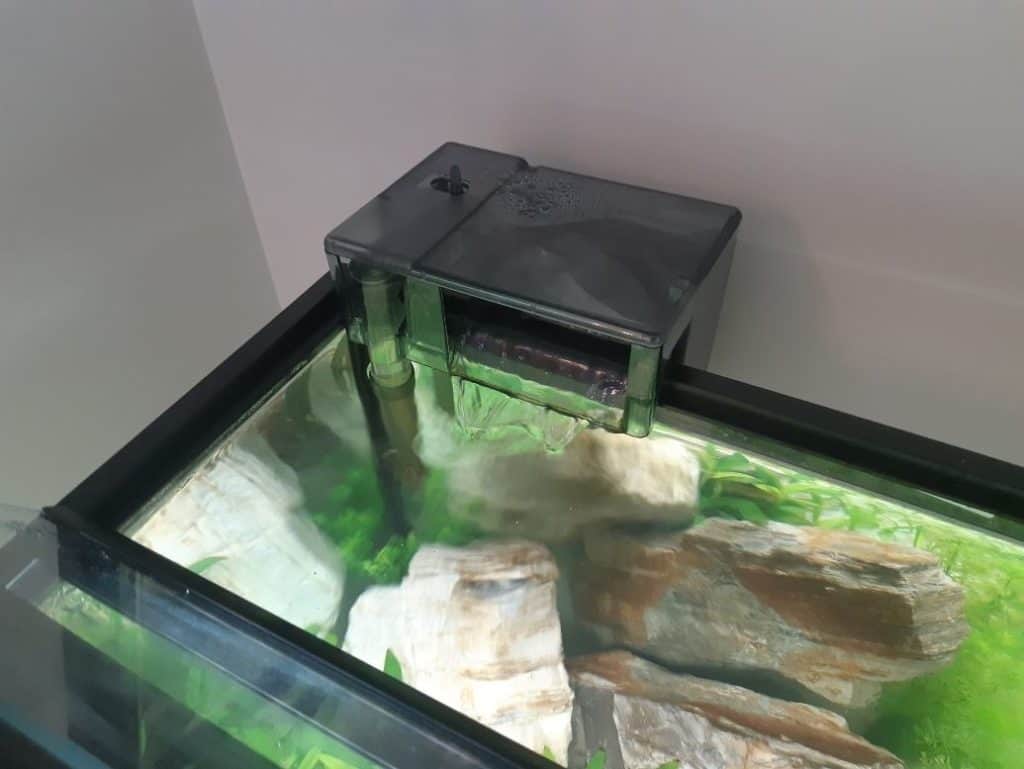
HOB filters generally require more maintenance due to the water intake getting clogged. This is especially true in planted tanks where they is often more loose debris to be collected.
| Pros | Cons |
| ✔️ Easiest to clean ✔️ Takes up minimal tank space ✔️ Customizable filter media ✔️ Adjustable flow rate | ❌ Power motor can burn out ❌ Can lower CO2 due to surface agitation ❌ Requires frequent maintenance |
Canister filters
This filtration system comes with a medium to large-sized canister that is usually stored in a cabinet beneath your aquarium stand. Similar to a hang-on-the-back filter, it has an intake and output tube that the tank water is transported through.
Canister filters are more expensive and especially useful for large-sized tanks with higher filtration requirements.
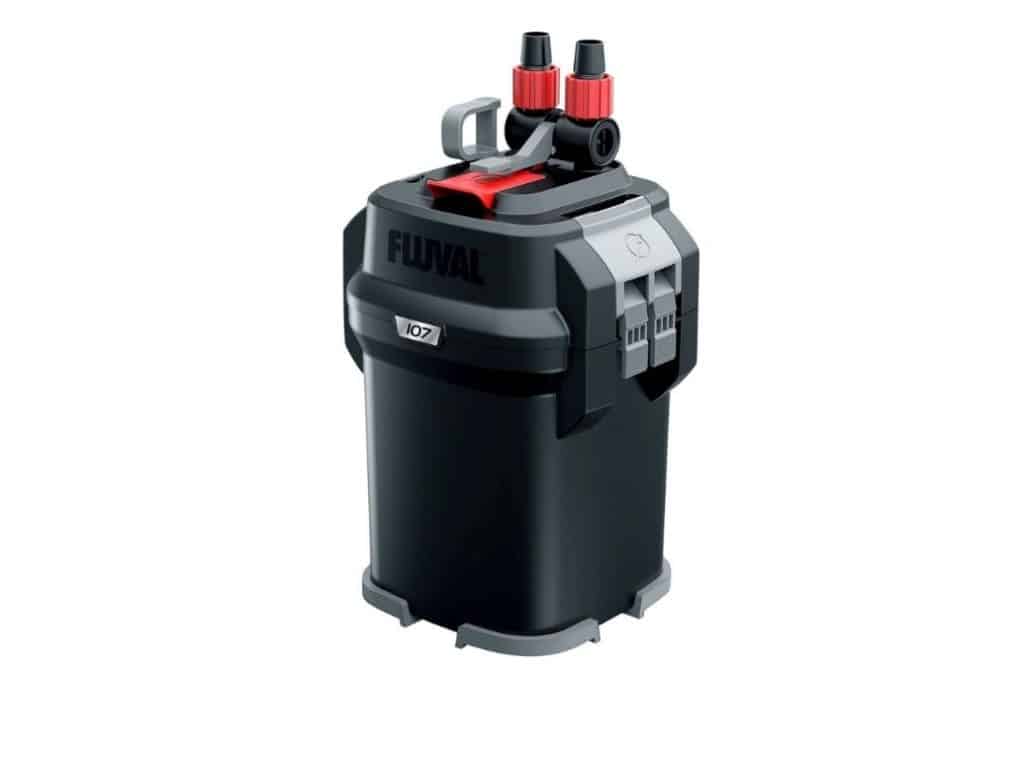
They typically achieve better filtration due to the tank water being sent through the filters with higher pressure. You can also add a greater volume of filter media, which increases total filtration and creates more space for beneficial bacteria to grow.
| Pros | Cons |
| ✔️ Quietest option ✔️ Takes up minimal tank space ✔️ Customizable filter media ✔️ Adjustable flow rate ✔️ Pressurized filtration | ❌ Power motor can burn out ❌ Most expensive option ❌ Difficult to clean ❌ Takes up the most out-of-tank space |
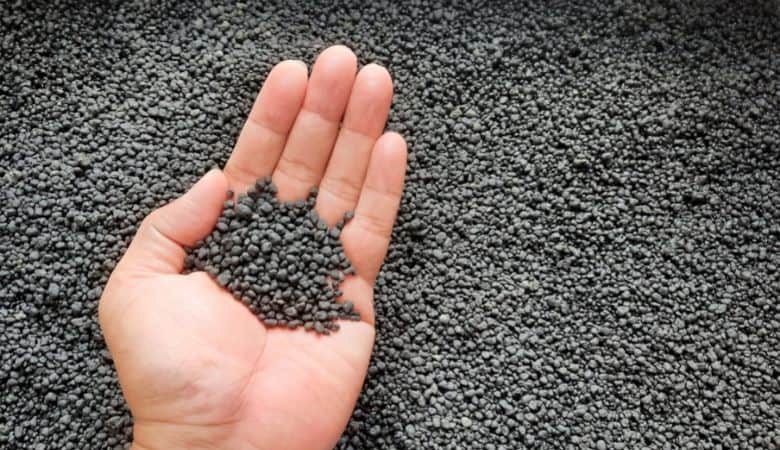
Substrate is crucial for successful plant growth
There are many types of aquarium substrates that can be used in low-tech planted tanks. All of them can be categorized into two categories: inert and active.
Inert substrate will not alter an aquarium’s water parameters, whereas active substrate will. This is because active substrates generally contain water softeners or nutrients for improving plant growth.
There are also some other active substrates designed to increase water hardness, such as crushed coral, for certain fish species like African cichlids.
Generally speaking, all substrates will work in a low-tech planted tank. But some may allow you to grow plants more easily.
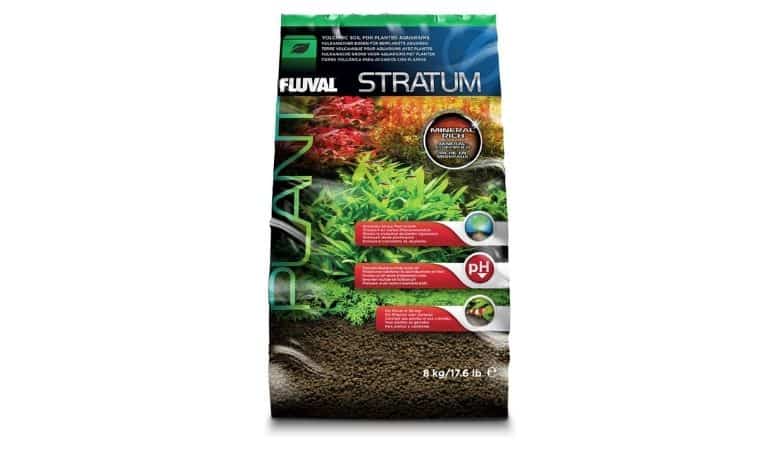
In our opinion, Fluval Statum is an excellent active substrate for low-tech tanks because it both softens your water and adds nutrients. These two factors will create a more suitable environment for your plants to grow.
At the moment, we are also having success with organic dirt-based substrate. For example, in our 20-gallon tank, we used a 1-inch base layer of organic potting mix, covered with a 2-inch layer of sand.
Real soil is packed full of nutrients, which means it’s comparable to even the best aqua soils. In fact, organic soil contains so much nutrients that it will quickly leach into a tank’s water column and create ammonia and nitrate spikes.
This is why a 1.5-2 inch sand or gravel cap is necessary.
So far, we’ve had the most success and best overall experience using a dirt substrate.
Our first planted aquarium was built using Seachem Flourite. This is an inert substrate made from clay. It does not provide nutrients like an active substrate would, but it’s a great alternative.
Fertilization for enhanced plant growth
Fertilization is the process of adding macro and micronutrients to either the substrate or water column. These nutrients are absorbed by plants and used to develop chlorophyll, leaves, root systems and more.
We believe fertilization is important in both high-tech and low-tech tanks. It’s crucial if you choose to use inert substrate that does not contain these important plant nutrients.
You could possibly grow plants successfully without fertilization if you use a robust active substrate such as ADA Amazonia or organic soil.
However, even active substrates tanks would likely benefit from added liquid fertilization.
There are a few methods for dosing fertilization in your aquarium:
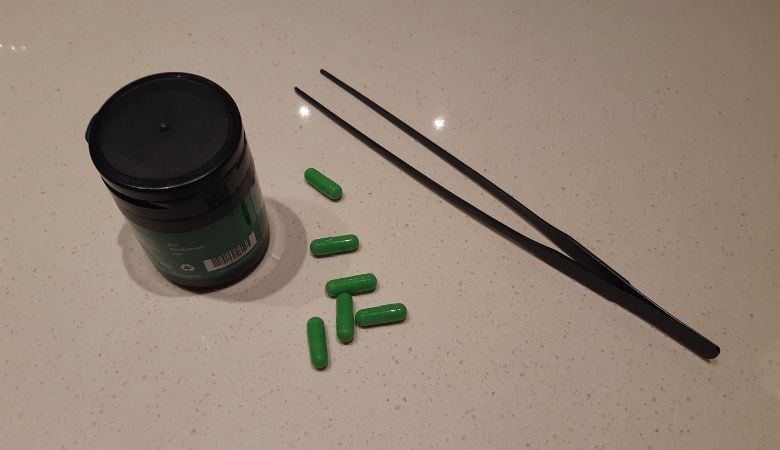
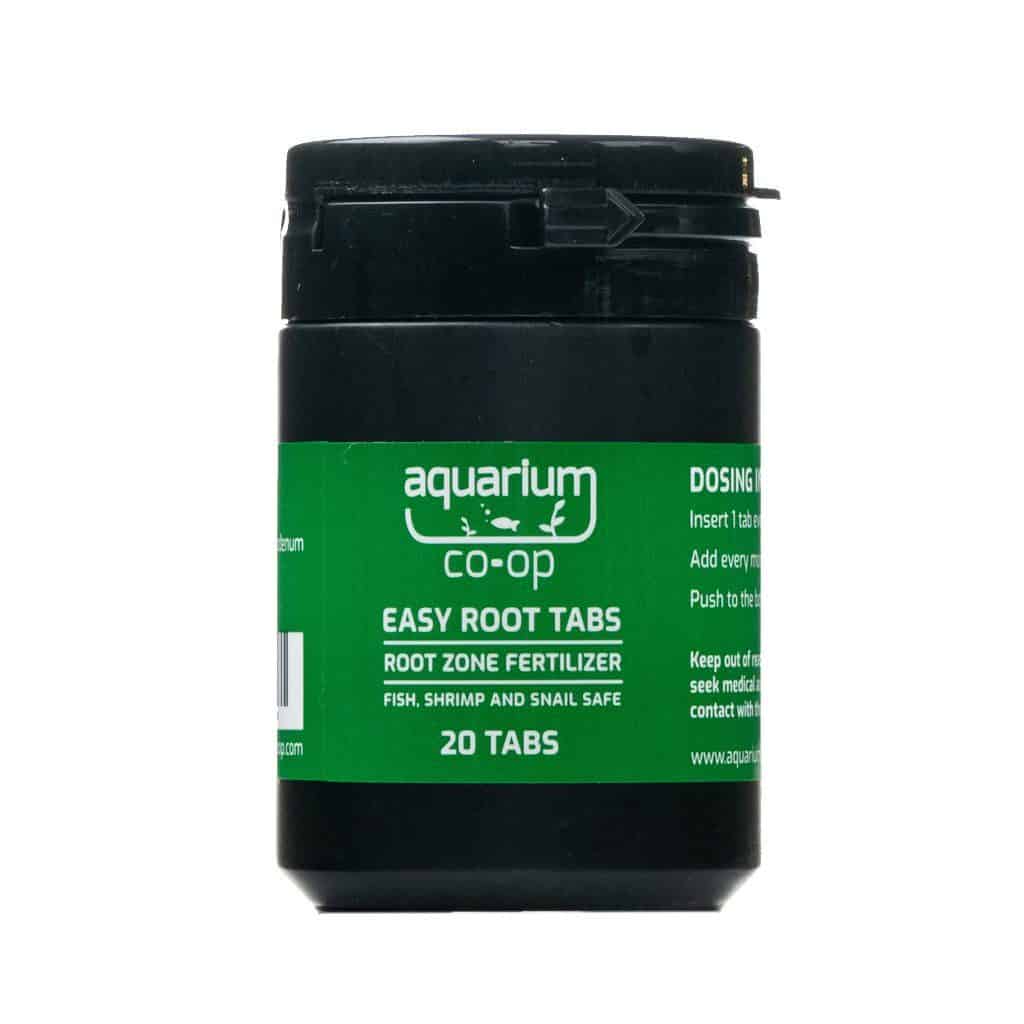
Root tab fertilization provides nutrients in the substrate
Root tabs are dissolvable capsules that are buried beneath your aquarium substrate. They contain macro and micronutrients necessary for healthy plant growth.
They are especially useful for heavy root-feeding plants such as sword plants and cryptocoryne species.
To add root tabs, simply bury them every 5-6 inches across your tank. In our experience, it’s best to bury new root tabs every 3-5 weeks or as you start noticing nutrient deficiencies in your plants.
We’ve had success with both the API and Aquarium Co-op root tabs. We are currently using the Aquarium Co-op ones and seem to be noticing slightly better growth, so We would recommend them first.

But there are many other root tab brands on the market that we would recommend trying. Some may work better for your tank depending on the specific nutrient requirements of your setup.
To make things simple, just try two or three and stick with whichever one appears to promote the best growth without encouraging algae blooms.
All-in-one liquid fertilizers add nutrients to the water column
This is a liquid form of the same macro and micronutrients. They usually come in a pump bottle and can be dosed directly into the water column.
These nutrients are best for plants that absorb more nutrients from the water column than their roots. All aquatic plants absorb nutrients from both their roots and the water column. But some lean more towards one or the other.
We recommend using both root tabs and all-in-one liquid fertilizers for your low-tech tank. This will give your plants the best chance of flourishing.
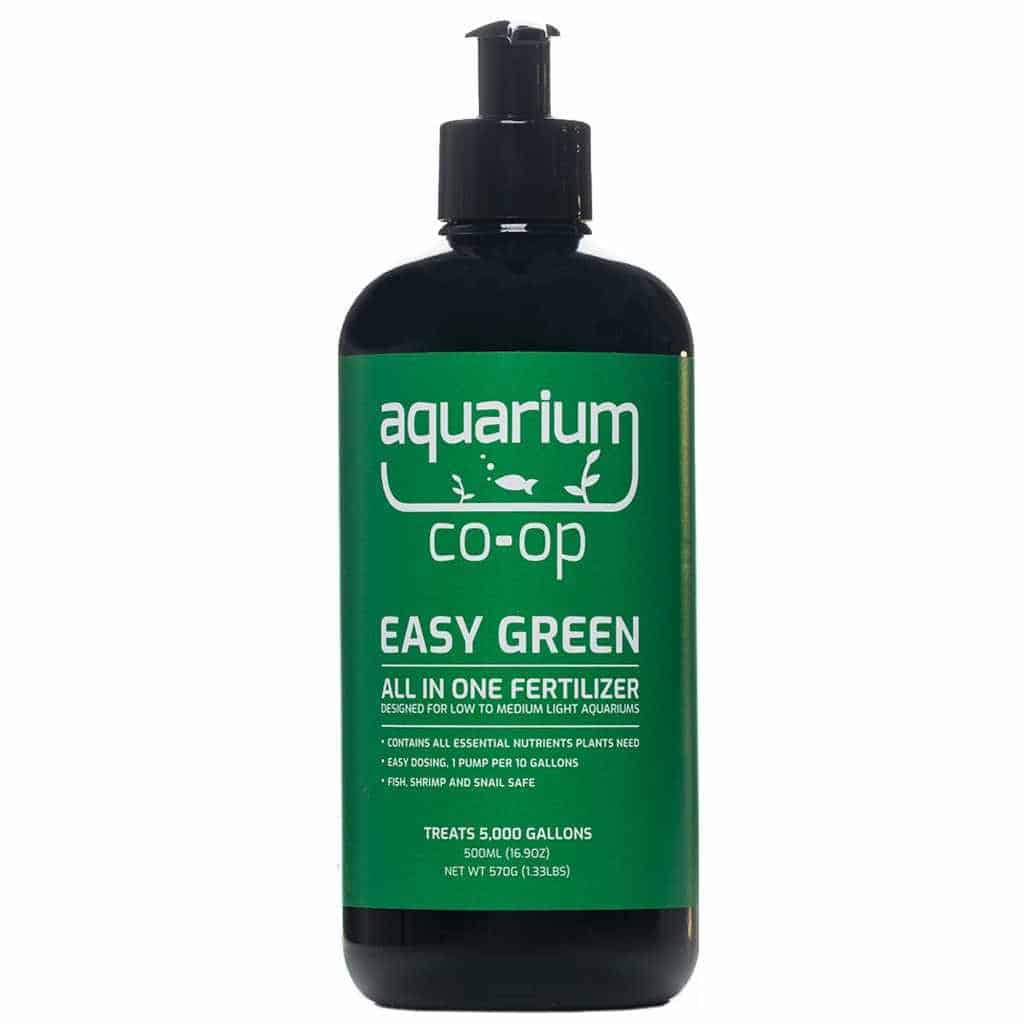
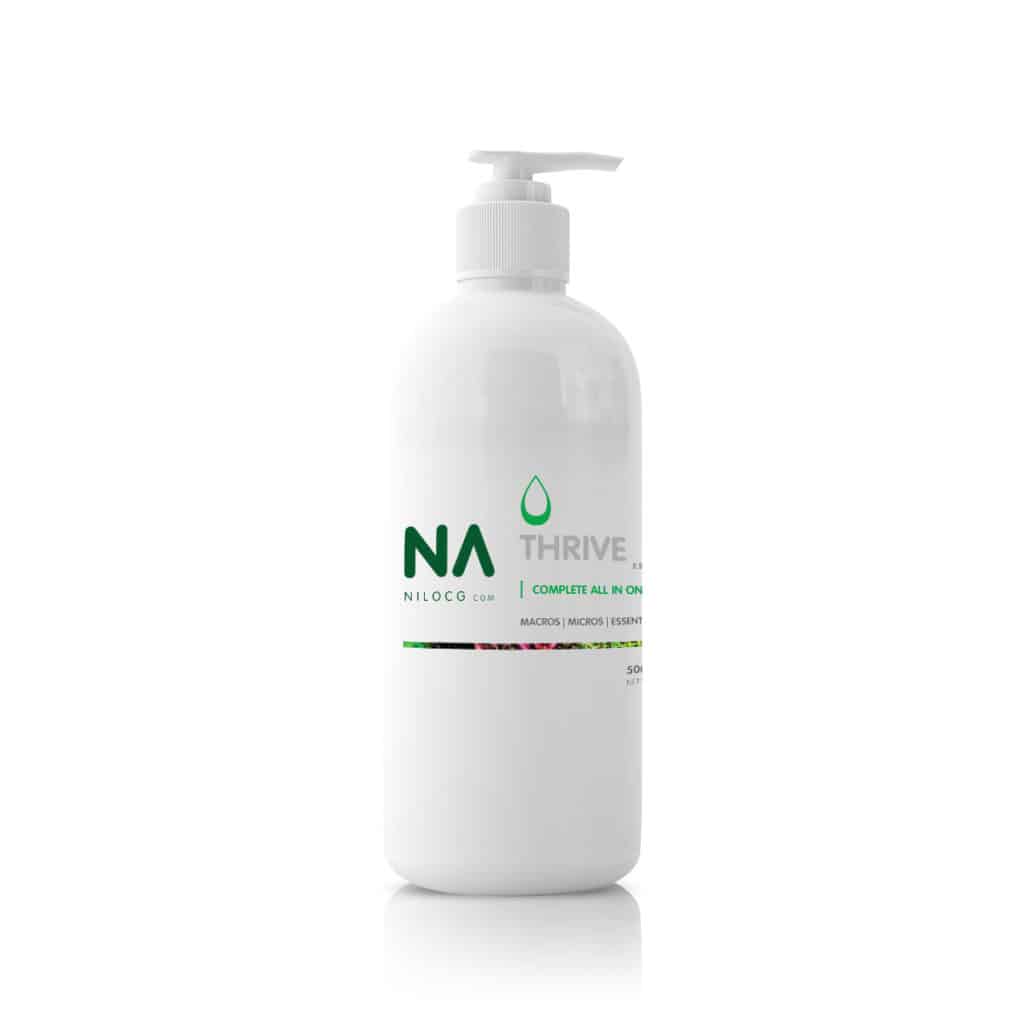
We’ve only ever used Thrive all-in-one liquid fertilizer because it is more easily available in Canada. But we have heard excellent feedback from other aquarist who use Aquarium Co-op Easy Green.
Choose plants that you will have the most success growing
Plants are the obvious requirement when building a low-tech planted tank. Each plant species will thrive in slightly different water parameters and will consume varying amounts of macro and micronutrients.
If you’re building your first planted tank, we recommend choosing the easiest and most fail-proof plants you can to increase your probability of success.
When we first started, we naively believed we could grow any plant species. We proceeded to choose some species that are known to grow poorly in our local water conditions.
Also, our lack of experience with substrates and fertilization caused many of our plants to melt back and completely die off. This wasn’t a particularly encouraging experience.
The reason this happened is because we wanted the most beautiful-looking plants in our tank. The problem is that many of the nicest-looking aquarium plants you see displayed online are grow by professional aquascapers in high-tech setups.
This gave us the false belief that we would have success growing the same plants.
After learning the hard way that we were not experienced enough to grow certain plants, we lowered our standards and opted for easy-to-grow beginner plants.
We were able to successfully grow these plants, which made the planted tank experience so much more enjoyable.
We believe you will have more fun if you choose some easy plants for your first tank. You can always upgrade later on.
Optional equipment
Aqua soil substrate contains plant nutrients
Aqua soil is active substrate that is designed specifically for growing plants. It usually contains macronutrients, micronutrient, water softeners or some combination of all three.
These ingredients are exactly what plants need to thrive in your aquarium, which is why they’re a popular substrate choice for many planted tank keepers.
The most popular aqua soil brands are as follows:
- ADA Amazonia
- Fluval Stratum
- Tropica Aquarium Soil
- Mr. Aqua Aquarium Soil
- CaribSea Eco-Complete
Aqua soils are crucial for high-tech tanks that are growing demanding plant species. However, aqua soils are not necessary for low-tech tanks.
You can successfully grow plants in inert gravel if you supplement root tab fertilization.
With that being said, we recommend trying an active substrate such as Fluval Stratum because it will certainly benefit your plant growth. But we recommend only using an active substrate if you don’t currently have fish in your tank.
The reason for this is that most active substrates will change your water chemistry, which will harm any fish that are currently in your tank.
Hardscape adds visual appeal to your aquascape
Hardscape refers to the rocks, driftwood and other stationary non-living features in an aquarium. It is used mainly to create visual appeal and hiding spaces for your tropical fish.
Driftwood also releases tannic acid which will reduce your water’s pH levels. It may also slightly darken your tank water, which can create a more naturalistic environment for some fish species.
Hardscape is an optional feature that can be added to any low-tech or high-tech tank.
Equipment that is not required
CO2 is for high-tech tanks
By definition, low-tech tanks do not have CO2 injection. There is a small amount of CO2 naturally present in your water though.
There are things that you can do, such as reducing surface agitation, to increase your tank’s CO2 levels.
Also, remember that floating plants or plants that grow above the surface of your tank’s water will have access to atmospheric CO2 present in the air. This will allow them to grow more quickly.
High lighting will cause algae in low-tech tanks
High-intensity lighting will likely cause algae blooms because it requires higher CO2 levels to balance it out. Low-tech plants will be unable to utilize excess light energy to create glucose.
Instead, the excess lighting will benefit algae growth and will likely cause algae blooms to occur.
A low or medium-intensity lighting is best for low-tech tanks. If your budget allows for it, we would recommend getting a medium-intensity light that can be adjusted and set with an automatic timer.
These features will allow you to experiment with lighting intensity and duration to create an optimal environment for your specific plant choices.
We recommend starting with an 8-hour photoperiod and adjusting the intensity up or down from there based on your algae growth.
Advanced fertilization for high-tech tanks
Advanced aquascapers will buy individual powdered fertilizers. This allows them to precisely dose each macro and micronutrient based on their specific plant species.
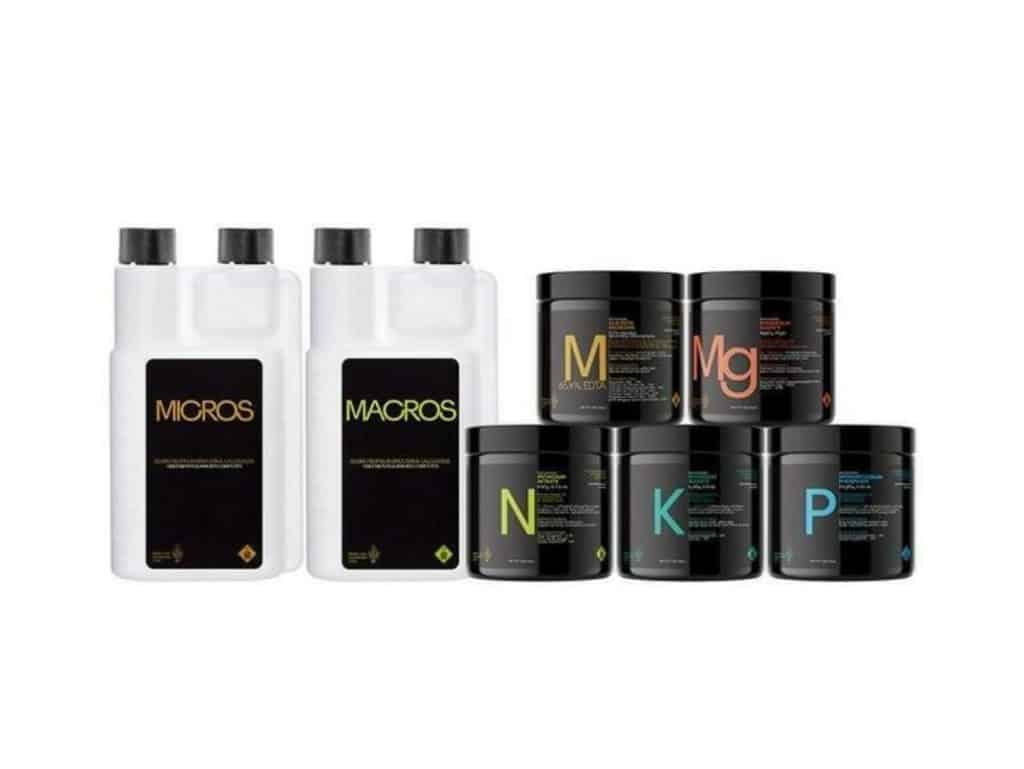
This advanced method is not necessary for low-tech setups. In fact, it not even necessary for most high-tech setups, except those that are intended for professional aquascaping competitions.
Planning process when building a new low-tech tank
It can be exciting to jump right in and start buying equipment at your local fish store. But we suggest considering the following points to give your tank the best chance at success.
Measure your tap water parameters
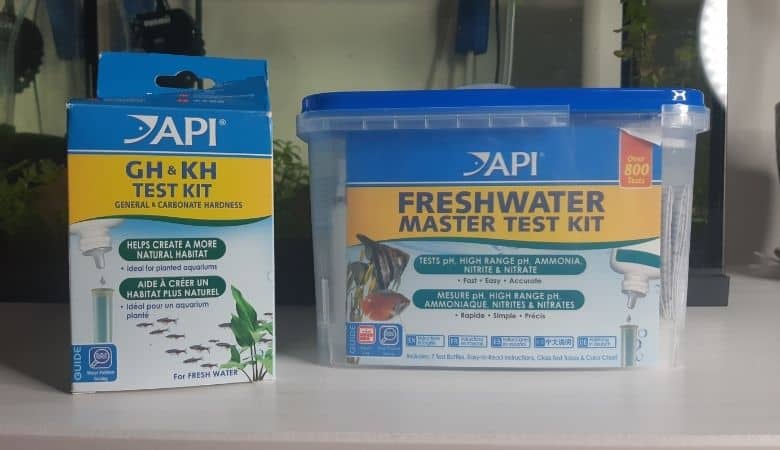
Your tap water will have a tremendous affect on how successfully you can grow plants. Start by buying an API Master Test Kit and API GH & KH test kit. Test for pH, GH and KH.
pH will affect whether or not certain plant nutrients will dissolve in your water and be absorbed by your plants. GH and KH will determine what types of topical fish you can successfully keep.
Here’s what we recommend thinking about when it comes to pH:
| pH | What to consider |
| 6.0-7.0 | This is an optimal range for planted tanks. Rasboras, cardinal tetras, discus and angelfish are great low pH fish. |
| 7.0-8.0 | Most plants will grow well in this range. Rainbowfish, bettas, zebra danios and gouramis are great in this range. |
| Above 8.0 | Some plant nutrients won’t be soluble. Consider sticking with “very easy” plants or softening your water with aqua soil. Platies, guppies, mollies, endlers and swordtails are happy in these conditions. |
Here’s what you might think about when it comes to KH:
| dKH | What to consider |
| 0-3 | This is a very low amount of carbonate hardness. This may cause your pH to fluctuate, which is harmful for your fish. |
| 4-6 | This is an acceptable dKH range that will provide sufficient buffering for most aquariums. |
| Above 6 | This is an exceptional dKH and likely means your pH is above 7.5. |
Here’s what you might think about when it comes to dGH:
| dGH | What to consider |
| 0-4 | Very soft. Most fish require more hardness than this. |
| 4-8 | Soft. Great for tetras, angelfish and corydoras. |
| 8-12 | Moderately hard. This is the biggest part of the bell curve where most tropical freshwater fish thrive. |
| 12-18 | Hard. Great for livebearers such as platies, guppies, swordtails and mollies. |
| Above 18 | Very hard. Few species other than African cichlids do well in water this hard. |
Don’t be concerned if your local water doesn’t fall within the “ideal” ranges above.
We recommend researching plants and fish species that will thrive in your water conditions. The reason for this is because it’s much easier and safer to use your tap water than it is to try and change the parameters to match an “ideal” figure.
If you do something that changes your water chemistry, you will need to try matching those conditions each time you do a water change. Fluctuations may cause fish stress.
Establish your budget
It’s easy to exceed your budget if you’re not careful. So set a budget and stick to it.
Choose a tank size based on your fishkeeping goals
The “right” tank size for you will depend on the fish you want to keep, your budget and and few other factors.
Tank size will affect which fish species you can keep
Many people agree that you should have no more than 1-inch of fish to every 1-gallon of water. For example, if you wanted to keep five 2-inch platies then you should buy no less than a 10-gallon tank.
However, this rule forgets that a typical 10-gallon tank will likely only contain around 7-gallons of water when you take into consideration the substrate, plants or decorations, filter, hardscape and the fact that the water won’t be filled to the brim.
Therefore, your tank’s capacity is likely a little less than you might realize.
Some species require more space
This 1×1 rule is far from perfect, though.
For example, five 1-inch neon tetras might appear to meet the 1-inch-per-gallon rule. However, it’s well documented that this species does best in schools of 15 or more. They also require much more space due to their very active schooling behavior.
Therefore, it’s best to keep that species in a 40-gallon tank or greater.
Make sure you do some research on your desired fish species before buying.
Understocking is never a bad idea
Over-crowding a tank often leads to territorial aggression in many fish species. Also, a small home can cause stress and a lack of enrichment.
We always recommend understocking your livestock because it will cause fewer issues and allow you to keep happier fish.
Let your budget decide your tank size
A larger tank will cost more money. If budget is a constraint then consider choosing your tank size based on your budget and determine what fish species you’ll be able to keep from there.
Larger tanks are a little easier to maintain
It may sound counterintuitive but larger tanks are often a little easier to maintain.
One reason has to do with lower fish stress due to increased space, as discussed above.
But another reason has to do with maintaining stable water parameters. A larger volume of water will be less susceptible to ammonia spikes and will accumulate waste less frequently.
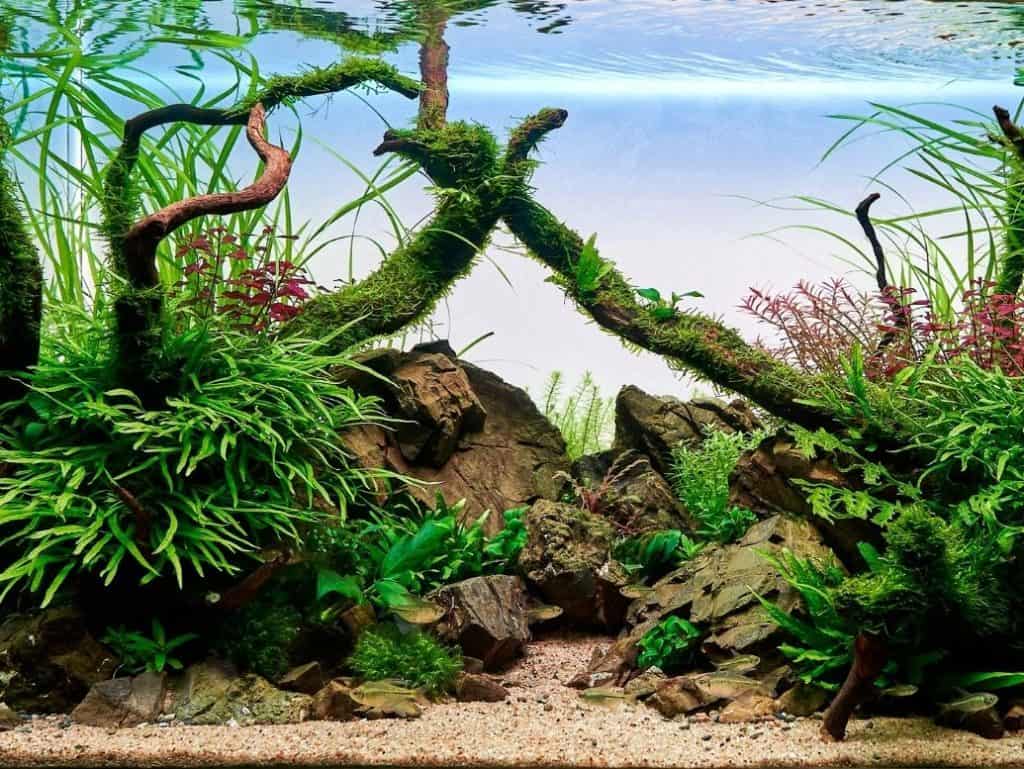
Low-tech aquarium plants
There are hundreds, perhaps thousands, of aquatic plant species that can be grown in planted aquariums. But when building a low-tech tank, some plants will be more difficult to grow than others.
We recommend choosing plants that will thrive in the low-CO2 and low-lighting conditions that are characteristic of a low-tech setup
Low-tech background plants
Generally speaking, it looks nice to have taller plants in the background of your aquarium and shorter plants in front. This increases the depth and makes the tank look a little bigger.
Here are a few background plants that will grow well in most low-tech tanks:
Vallisneria variants
Vallisneria is an aquatic plant that propagates by shooting out runners. Each node will sprout a half-dozen or so leaves, which can grow up to 60cm (24-inches), depending on the species variety.
They are beginner-level plant that will grow in a variety of water conditions:
- Temperature: 63-82 degrees Fahrenheit (17-28 degrees Celsius)
- pH: 6.5-8.5
- Substrate: Any
- Growth rate: Moderate
Bacopa variants
Bacopa plants are a nice-looking and nice-smelling stem plant that will grow well in the background of your low-tech tank.
It doesn’t require CO2 or any particular type of substrate. Although it would benefit from a nutrient-rich substrate or root tab fertilization.
- Temperature: 63-82 degrees Fahrenheit (17-28 degrees Celsius)
- pH: 6.0-8.2
- Substrate: Any
- Growth rate: Moderate
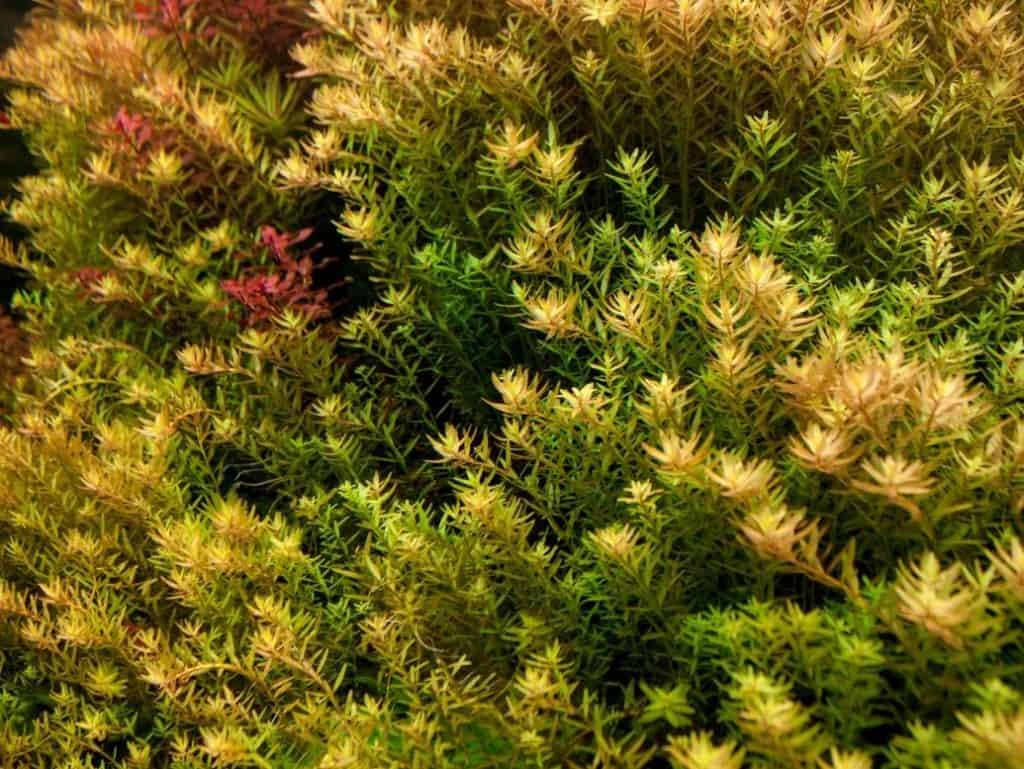
Rotala rotundifolia
Rotala rotundifolia is a nice bushy-looking stem plant that looks beautiful in most aquariums. In higher lighting it will appear more red. But in low-tech tanks it will usually appear green.
- Temperature: 63-82 degrees Fahrenheit (17-28 degrees Celsius)
- pH: 6.0-8.2
- Substrate: Nutrient rich
- Growth rate: Moderate
Low-tech mid-ground plants
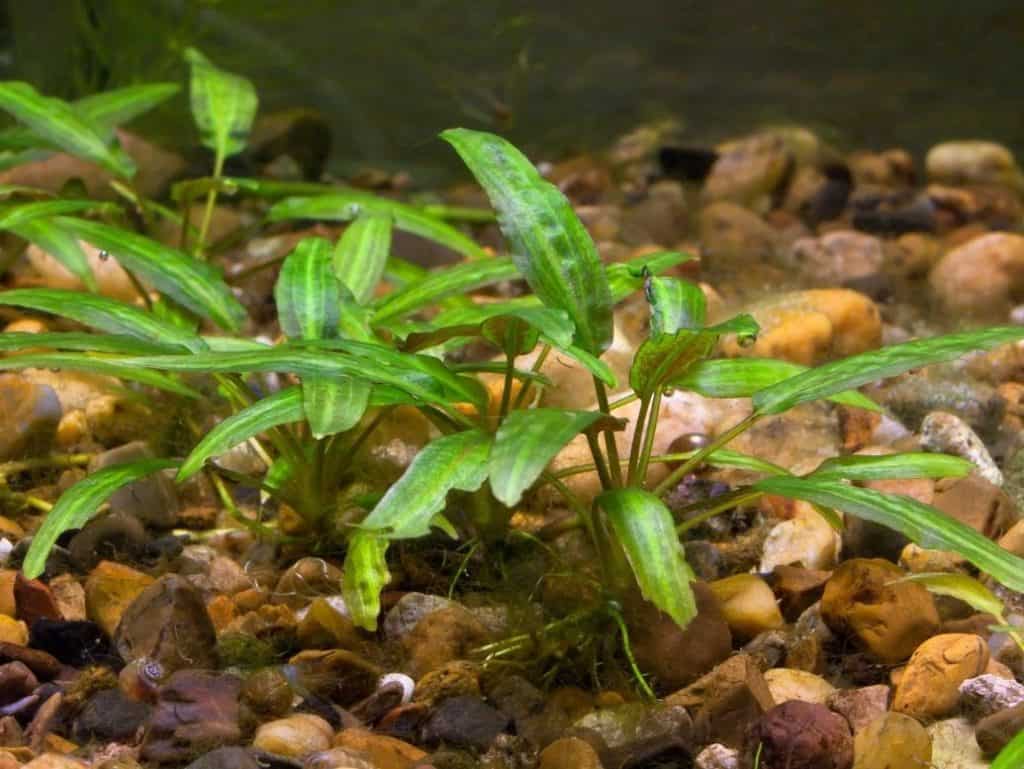
Cryptocorynes variants
Cryptocoryne are a widely available plant that come in a variety of species. They grow exceptionally well in pretty much any type of water. Root tab fertilization helps as they do tend to grow fairly robust root systems.
They don’t grow very tall and can be easily out-competed for light. We recommend planting them in locations where they will receive their fair share of light.
- Temperature: 63-82 degrees Fahrenheit (17-28 degrees Celsius)
- pH: 6.0-8.5
- Substrate: Any
- Growth rate: Fast
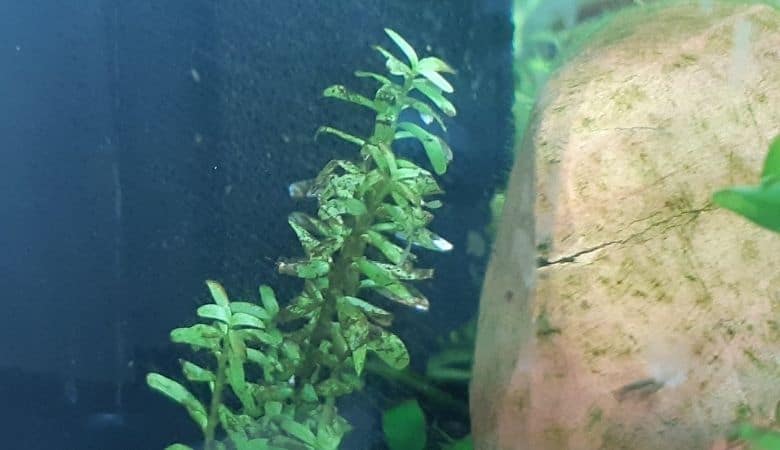
Hygrophila variants
Hygrophila polysperma is the plant species we’ve had the most success growing in our low-tech setups. We’ve even had success growing it in inert substrate with root tab fertilization.
- Temperature: 63-82 degrees Fahrenheit (17-28 degrees Celsius)
- pH: 6.0-8.5
- Substrate: Any
- Growth rate: Fast

Low-tech carpeting plants
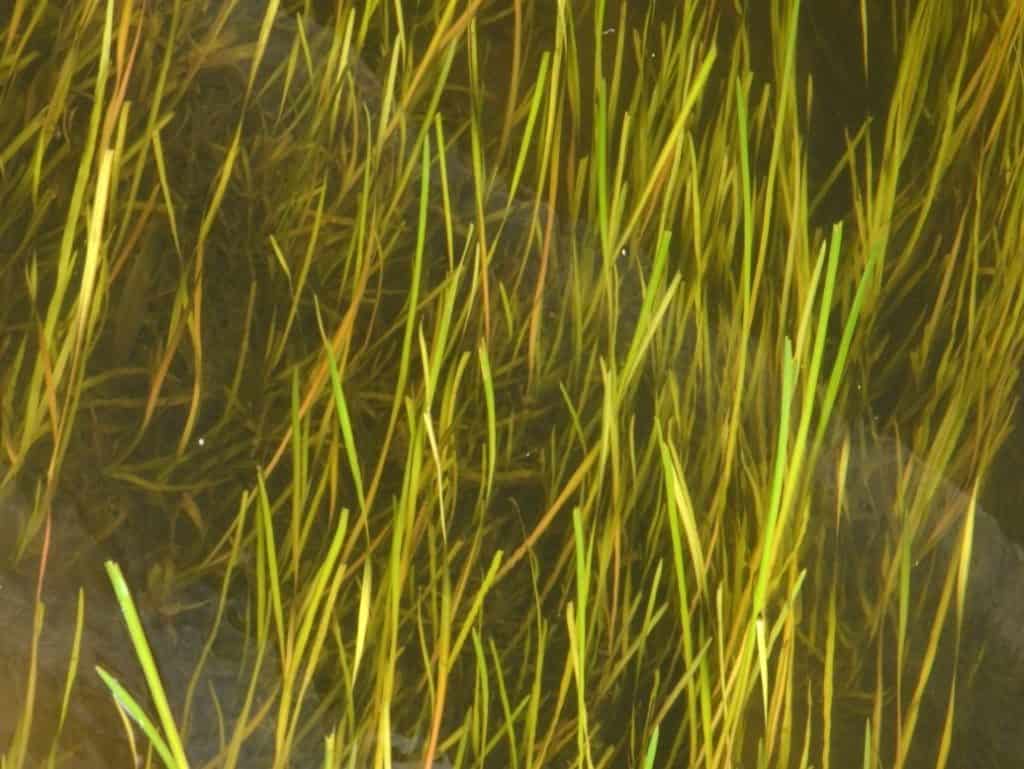
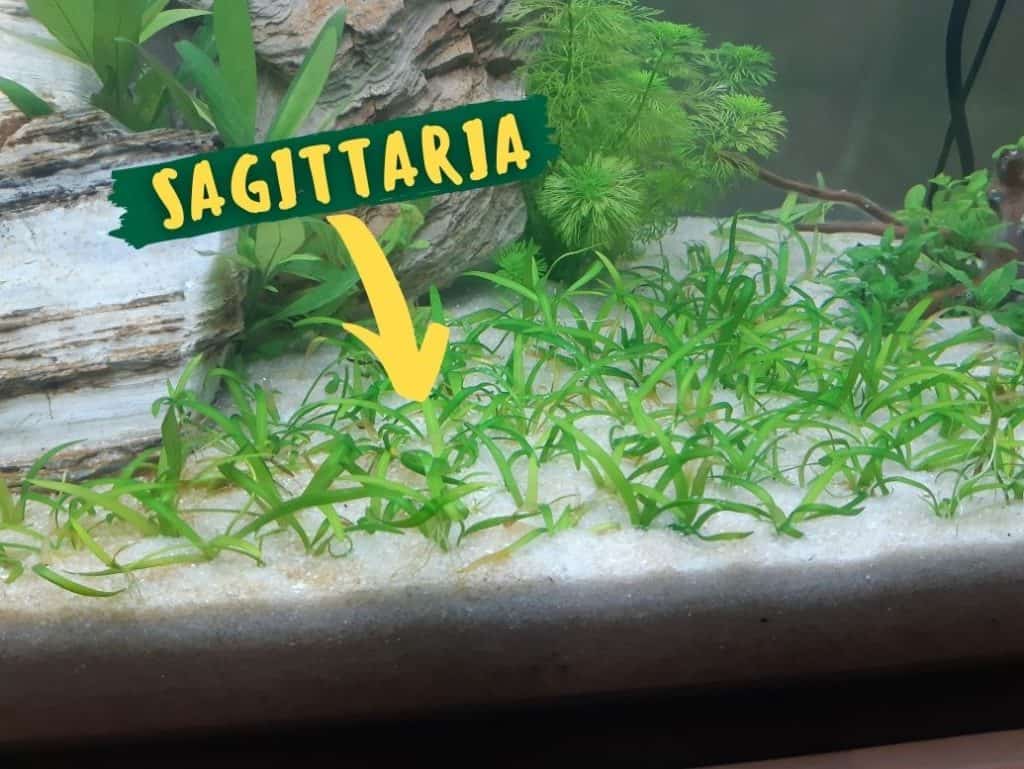
Sagittaria variants
Sagittaria is a grass-like plant that is very undemanding and will grow well in most tanks.
- Temperature: 68-82 degrees Fahrenheit (20-28 degrees Celsius)
- pH: 6.0-8.2
- Substrate: Nutrient rich
- Growth rate: Moderate
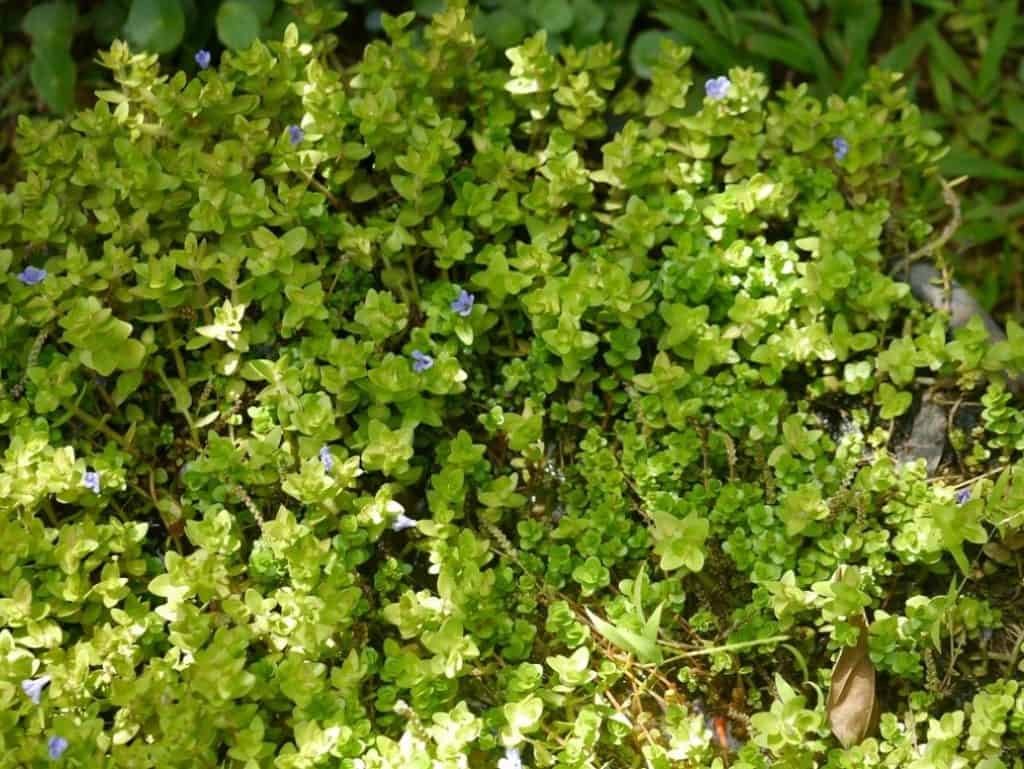
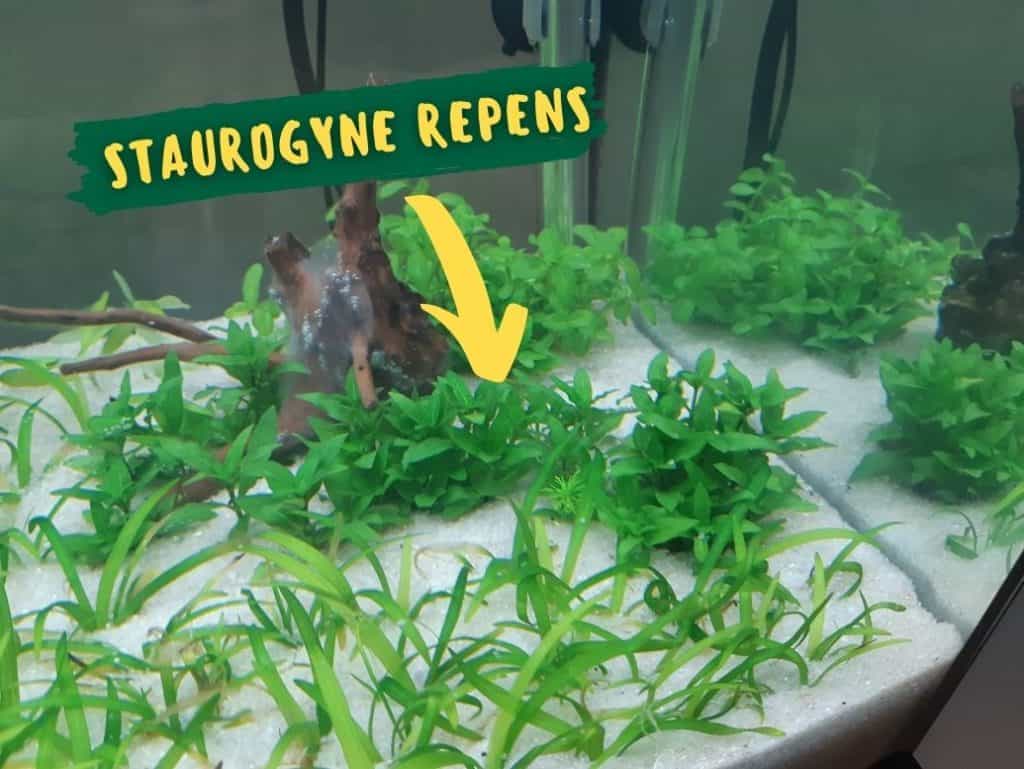
Staurogyne repens
Staurogyne repens, sometimes referred to simply as S. Repens, is an easy-to-grow mid-ground plant that will grow in pretty much any low-tech aquarium.
In lower-light conditions, it will usually grow taller to reach the light. In higher-light conditions it will tend to grow horizontally and act more as a carpet plant.
In our experience, staurogyne repens is one of the nicer-looking low-tech plants. It has a nice bushy look to it.
- Temperature: 68-86 degrees Fahrenheit (20-30 degrees Celsius)
- pH: 6.0-8.2
- Substrate: Nutrient-rich
- Growth rate: Moderate
Tissue culture plants vs. potted plants vs. bunched plants
There are a few types of aquarium plants you can buy: potted, bunched and tissue culture. We’ve had success growing all types, but personally prefer tissue culture plants due to their guaranteed safety.
Tissue culture plants
Tissue culture plants are grown in-vitro in sterile laboratory conditions. This means that the plants are guaranteed to be free of pests, pesticides and algae.
They usually come in small transparent plastic cups and are much smaller in size than potted plants purchased from your local fish store.
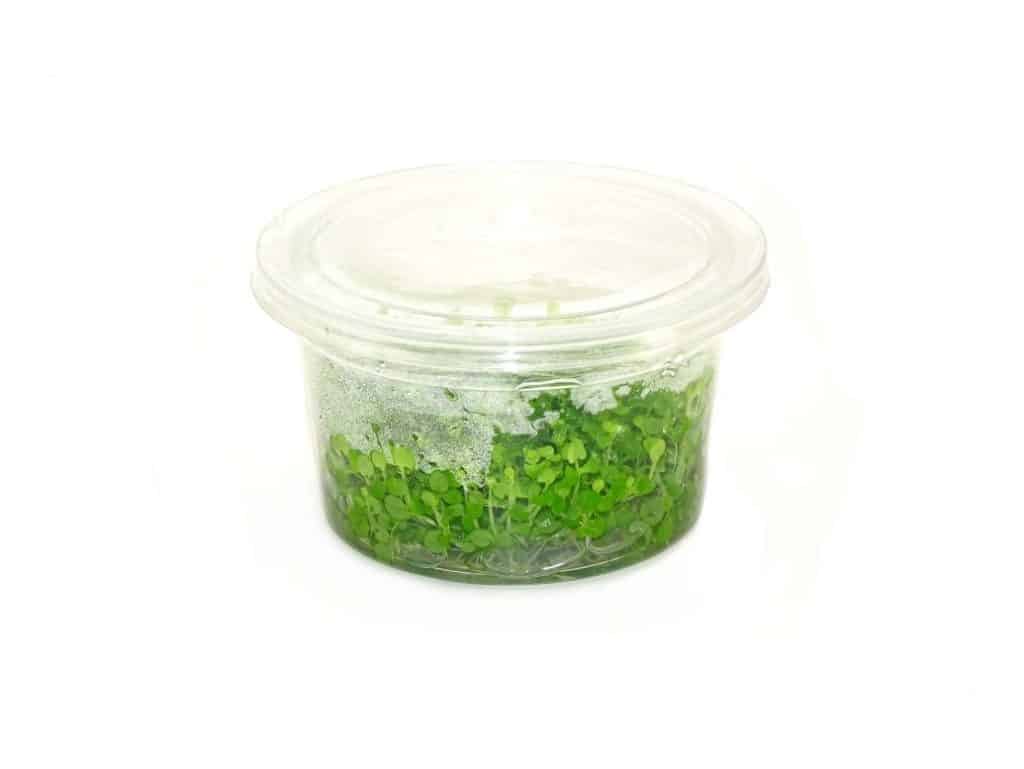
The main benefit is that these plants pose little to no risk when adding to your system. But the drawback is that they are much smaller in size and will take longer until your tank looks fully grown out.
Potted plants
Potted plants are usually grown in plastic net pots with rock wool wrapped around the roots. The pot makes them easy to contain and transport, while the rock wool keeps the root system moist.
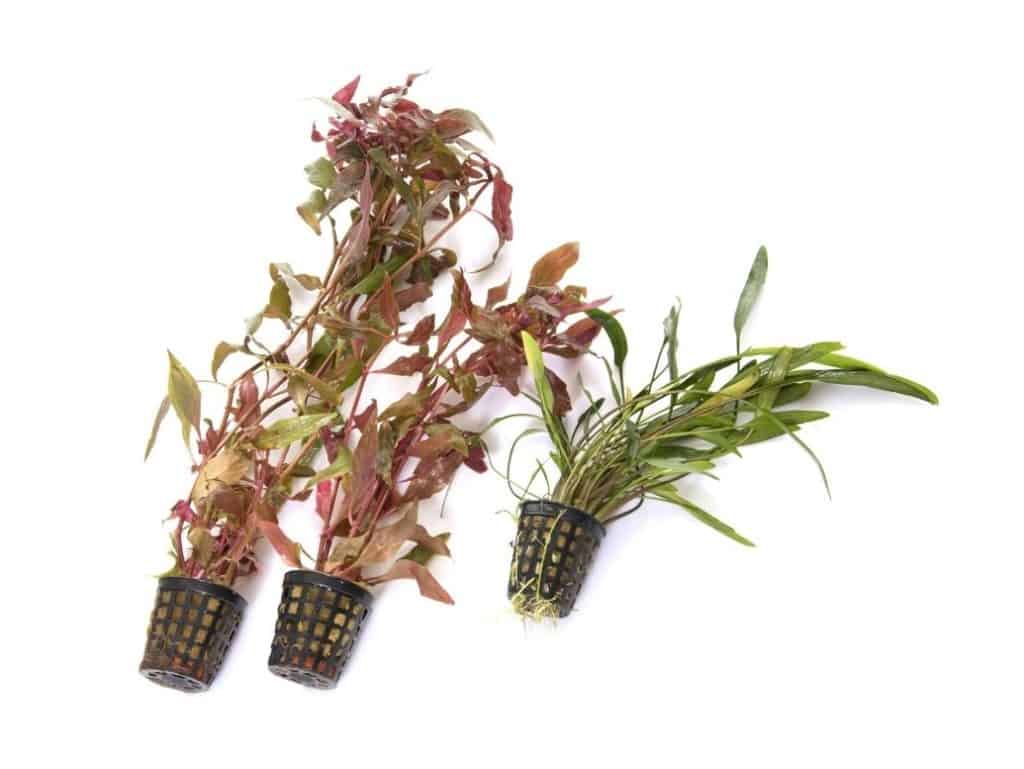
These plants are often larger in size but are more likely to contain pests and algae.
Bunched plants
Bunched plants are often stem plants that are trimmed and bunched together using foam and lead band. These are usually grown in substrate, outside of a pot, and then bunched together when sold.
Most aquarium plants are grown emersed, or out of water, because it’s less expensive and because the plants have access to atmospheric carbon-dioxide. This makes them easier to grow.
It also reduces the chance of algae growth and increases their survival rate when being transported.
This is worth remembering because many emersed-grown plants “melt” back when first submerged in your aquarium. But they will grow back with their “submerged” form.
Where to buy aquarium plants
Many local fish stores will sell a variety of aquatic plants. Some retailers will carry tissue culture plants from a company such as Tropica. They may also offer a variety of potted and bunched plants grown locally.
It’s also popular to buy aquarium plants online. You may encounter issues shipping plants across international borders due to invasive species regulations.
For example, living in Canada, I’m only able to buy plants from Canadian-based plant stores.
Generally speaking, aquatic plants are easy to find and relatively inexpensive.
How to prepare your plants for planting
Although you may be eager to immediately add new plants to your aquarium, it’s best practice to clean your plants before planting them.
This will prevent any possible pests, algae and pesticides from entering your aquarium.
Soak in diluted bleach
Here’s what you will need:
- Bleach
- Two containers
- Gloves
- Dechlorinator/water conditioner
First, remove the lead strip, rock wool, plastic, foam or other packaging material from your plants. Then manually remove any dead or melting leaves that you notice.
Next, soak your plants in one of the containers with regular tap water. Gently shake your plants to rid of any loose debris.
Next, we will prepare one container with 1 part bleach and 20 parts water. It’s best to wear gloves while doing this.
You should also prepare your second container with fresh tap water and water dechlorinator/conditioner. We use Seachem Prime for our aquarium and this will work just fine here.
We add more dechlorinator into the plant rinsing container than we would in our aquarium. Half a cap-full (2.5ml) is fine. In fact, you won’t over-dechlorinate your plants so it’s better to add a little extra to make sure we remove all of the bleach from the plants.
Bleach is mostly just a high concentration of chlorine, which is what aquarium water conditioner removes from our tap water. Rinsing your plants in water conditioner/dechlorinator will remove the chlorine and make the plants safe to add into your aquarium.
Next, soak your plants in the bleach solution for 90-120 seconds. Then remove them and immediately rinse under your tap for at least a minute. Lastly, let them soak in your dechlorinator solution for a few minutes. You’re done!
You can now add to your tank.
Quarantine new aquarium plants
The primary reason for quarantining plants is to rid of pests, such as snails.
It’s recommended that you first perform a bleach dip before quarantining your plants because things like pesticides and parasites will not be visible after a quarantine.
To quarantine your plants, simply add them to a separate tank with lighting and fertilizers. Keep them under observation for about a month before adding to your main tank.
Plant quarantining is not necessary, but useful if you’re buying plants from an unknown source or want to be sure that all pests have been removed before adding to your display tank.
Quarantining is not necessary for in-vitro grown plants as they are grown in sterile conditions.
How to add your plants
Rinse and soak your substrate
The first step is adding our substrate into the tank, which is what we will be planting our plants into.
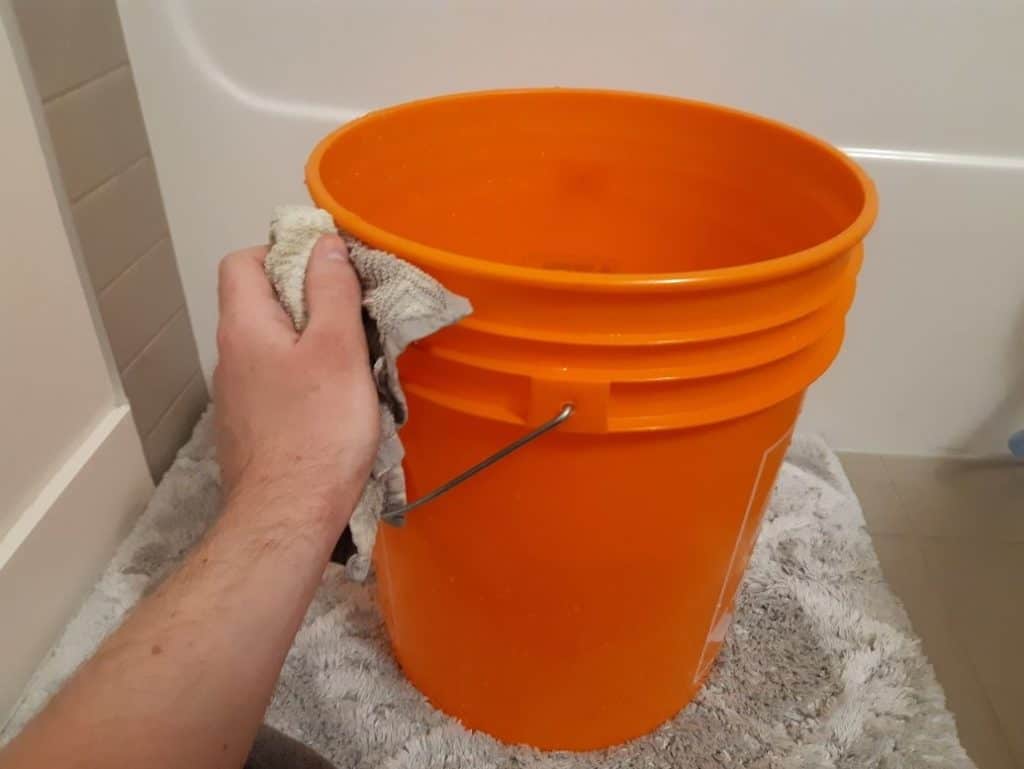
If you’ve chosen to use an insert substrate, such as gravel or sand, it’s best to thoroughly rinse it before adding to your aquarium. You can do this in your sink or bathtub using tap water and a 5-gallon bucket, which we like buying from The Home Depot.
Rinsing will remove any loose debris caused by transporting the product. This debris and dust will cloudy your water.
It’s especially important to rinse Seachem Flourite because it’s incredibly dusty. This is because it’s clay-based and erodes somewhat easily during transportation.
We would recommend doing this outside with a garden hose if possible because the clay dust is not great to be sending down your indoor plumbing.

If you’re using an active substrate, such as Eco-Complete or Fluval Stratum, it’s best not to rinse because these substrates contain nutrients that we want to add into our tank.
Also, the aqua soil balls will disintegrate if you rinse them.
Add your root tabs
Next, we want to add root tabs to help the plant root systems more easily absorb nutrients. Add enough root tabs so there is one every 5-6 inches of area across your substrate.
For example, if you have a 24″x12″ tank, that’s 288″ of substrate area. Divide that by 36″ (6″x6″) and you’ve got 8 root tabs to plant.
To plant them, simply use aquascaping tweezers or your fingers and push them as far down into the substrate as you can.
Root tabs will often come in pill capsules, which are dissolvable and designed to be safely added to your tank.
Other root tabs, like those from API, are simply dissolvable tablets that are not contained within a pill capsule. These tablets will start dissolving as soon as they touch water so try and bury them quickly.
Remove your plant packaging
Next, remove the packaging your aquarium plants arrived in. There are a few different packaging methods.
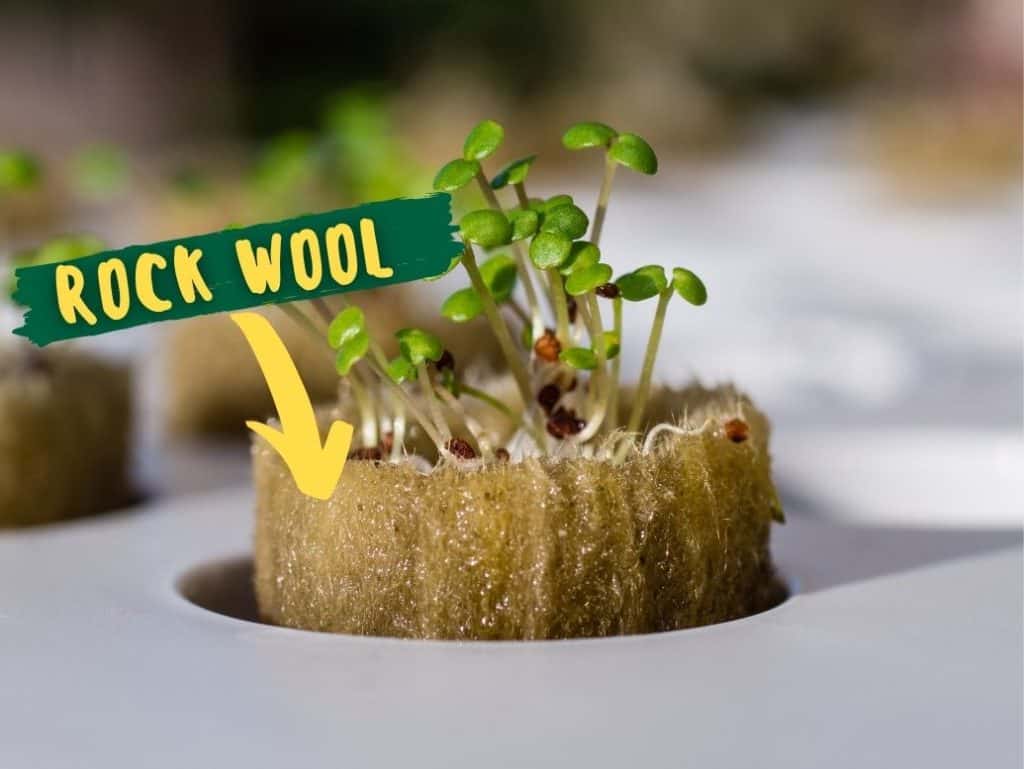
Rock wool
Rock wool is a mineral fiber that is wrapped around young aquarium plants. It helps maintain moisture and provides adequate oxygen to sustain plant growth while being transported to consumers.
We find that the easiest way to remove rock wool is by using a fork to scrape it off. This removes it quickly without damaging the roots too much.
In vitro cups
Many companies sell aquatic plants in small, transparent cups that are just an inch or so tall.
These plants are grown just inside of these little cups, in sterile conditions, to prevent outside elements from affecting the plants. This means that these types of plants are guaranteed to be free of algae and pests.
The drawback is that they are younger and smaller, which means they will take a bit longer to grow in your tank.
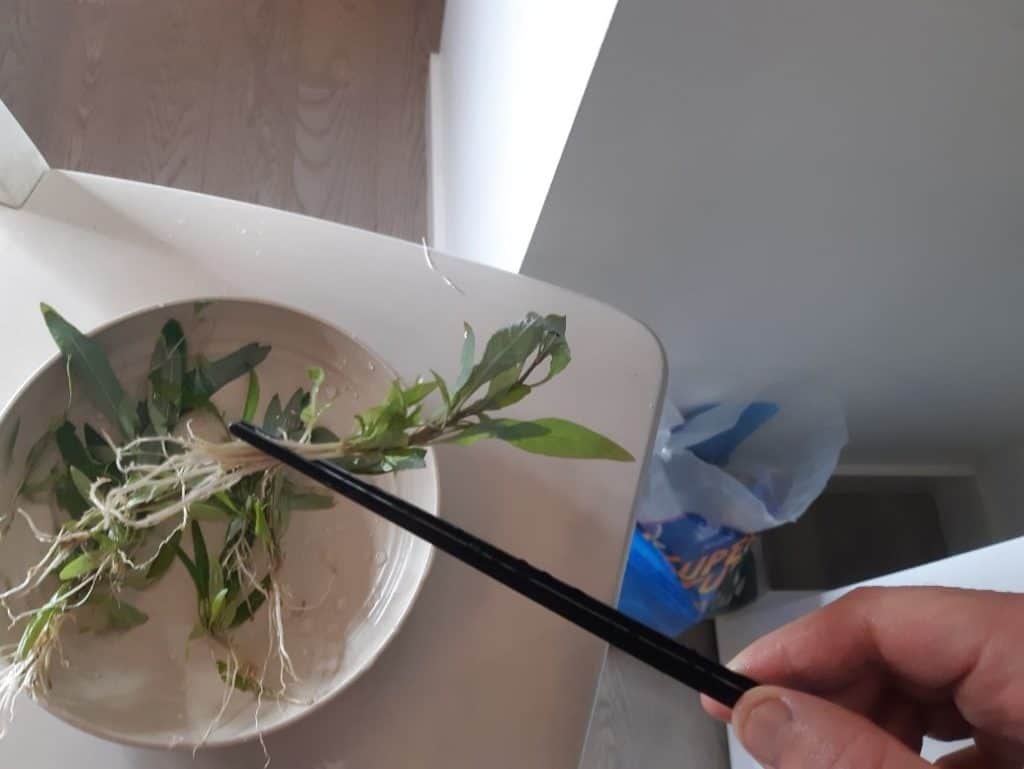
Separate your plants into sections
Gentle separate your plants into smaller individual plant sections as best as you can. Try not to break significant stems and root structures apart from each other.
Most plants can be separated into 3-6 sections whether they’re in-vitro or potted.

Plant with aquascaping tweezers
Grab your plants with aquascaping tweezers just above the roots and at a slight angle. This will make it easier to remove the tweezers from the substrate without uprooting the plant.
Gently push the roots about an inch into the substrate while your tweezers are completely vertical. While your tweezers are in the substrate, angle them down about 45-degrees so the plants are now positioned upright.
Then slowly open your tweezers and pull them out gently.
Your first few plants may pop out and float to the surface. But you will eventually find a technique that works well for you.
As long as you’re careful not to destroy the root systems, you can’t really go wrong here. Keep planting and repositioning until you’re happy with your aquascape.
Epiphyte plants
There is a category of plants that are considered epihytic. Meaning, they do not need to be planted in substrate.
In fact, planting these types of plants in substrate will likely cause them to die because their rootstock, or rhizome, will rot.
Instead, these plants can be wedged between hardscape, or attached to hardscape using aquarium floss or aquarium glue.
Here are a few of the most common epiphyte aquarium plants:
- Anubias varieties
- Bucephalandra
- Java fern
Squirt plants with water bottle throughout to keep moist
It’s not uncommon for a new aquarium to be planted before it is filled with water. In fact, many aquascapers choose to use this method to make it easier to position their plants where they desire.
If you do it this way, simply make sure you occasionally squirt your plants with water to keep them hydrated during this temporary water-less period.
Low-tech fertilization
Fertilization is the process of providing plants with required macro and micronutrients. Both high-tech and low-tech planted tanks require fertilization, but low-tech tanks require a little less.
They need less because the fertilization must balance the amount of CO2 and light the plants are receiving. Due the the reduced light and CO2 in low-tech setups, a lower amount of fertilization is required.
Fertilization is provided via root tabs buried in the substrate, liquid fertilizer squirted into the water column, or powdered fertilizer.
Powdered fertilizers are usually only necessary for high-tech display tanks where a specific effect is trying to be achieved. Low-tech tanks will do fine with root tabs and liquid fertilizers.
Root tabs
Root tabs are dissolvable, aquarium-safe, pill capsules that contain plant nutrients. There are many root tab brands available, which gives you some choice if you’re looking for specific nutrient compositions.
However, most root tabs contain a similar spectrum of macro and micronutrients. So if you’re unsure, simply try the root tab brand your local fish shop carries.
We currently use Aquarium Co-op Easy Tabs, but have had success using API’s root tabs as well.
We’ve found that adding root tabs every 3-4 weeks works best for our low-tech tank. Too much longer and we notice symptoms of nutrient deficiency such as yellowing leaves and holes in leaves.
It’s worth noting that we chose to use Seachem Flourite in our low-tech setup, which is an inert substrate without additional nutrients, which would be found in an active aqua soil such as Fluval Stratum or ADA Amazonia.
These active substrates may not require additional root tab supplementation due to the nutrients they provide. If you choose to use an active substrate, consider establishing your tank without root tabs to begin with.
If you notice nutrient deficiencies after 3-4 weeks, then consider supplementing with root tabs.
All-in-one liquid fertilizer dosingg
Once you’ve added plants you can now start adding liquid fertilizer as well.
because your low-tech tank will have reduced light and CO2 compared to a high-tech tank, it’s important that you don’t overdose your liquid fertilizers. This will undoubtedly cause algae blooms.
Most liquid fertilizers will include suggested dosing on the packaging. But we recommend monitoring your nitrate levels to gauge what an appropriate dosage is for your particular tank.
Specifically, I’d recommend keeping your nitrates around 20ppm. You can measure this using test strips or an API Freshwater Master Test Kit.
For example, Thrive liquid fertilizer recommends one full pump (2ml) twice per week for every 10-gallons.
But we’ve found that a full pump puts our tank to around 20ppm nitrate, which means two pumps per week will put our tank at around 40ppm or higher. Therefore, we administer just one pump per week. We also choose to add it in two 1ml doses instead of one single dose.
We also perform 1-2 water changes per week. Usually either one 40% change or a couple of 30% changes, depending on how high our nitrates are.
Our goal is to keep them at around 20ppm so every other week usually requires slightly more water to be changed out.
It doesn’t need to be an exact science but we’ve learned that consistency is important.
How to balance your water parameters
Algae blooms will occur when your aquarium’s light intensity, CO2 and fertilizers are unbalanced. Excess in any of these three parameters will cause opportunistic algae to thrive.
Carbon-dioxide balancing
In low tech-tanks, CO2 is limited to what is contained within your tap water. Other factors, such as too much surface agitation, may cause a tank’s CO2 levels to drop as well.
If you have a small amount of available CO2, then your plants will not be able to utilize energy absorbed into their chlorophyll from light. Nor will they be able to use all of the supplemented macro and micronutrients from your fertlization.
Therefore, you must reduce your light intensity, photoperiod or fertilization to match your CO2 levels.
Balancing your light intensity
In our experience, lighting is the easiest parameter to “overdose” in low-tech tanks. This is because many of the inexpensive LED lights we buy provide more than sufficient light for low-tech setups.
Also, many people expose their tank to a photoperiod that’s too long. The photoperiod refers to the duration of light your tank receives throughout the day.
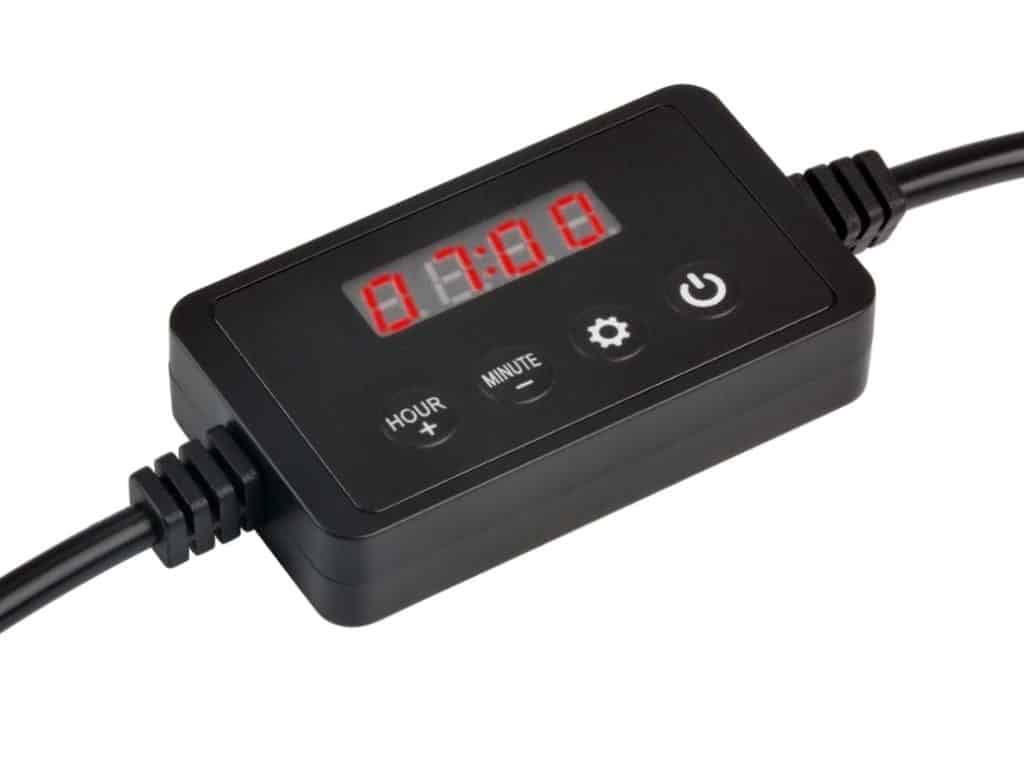
We recommend keeping your lighting on a set timer of between 8-10 hours per day. Many lights will come with adjustable brightness and built-in timers, such as the Hicrew or Fluval series lights.
To begin with, reduce your lighting to an intensity of between 60-80% of what your light is capable of with an 8-hour daily photoperiod. If you don’t get an algae bloom after the first week, consider either increasing your intensity by 10% or increasing your photoperiod by 2-hours.
Your tank’s “perfect” amount of light will depend on many factors. It’s best to keep your lights on a consistent schedule and make small adjustments each week until you find the sweet spot.
Low-tech lighting
In our experience, lighting is often the most confusing aquarium equipment to understand because of the terminology. You will often hear people talk about things like PAR, lumens, lux, watts per gallon, spectrum, kelvin and more.
It can be overwhelming to understand.
Luckily, you don’t need advanced knowledge to successfully light your low-tech tank.
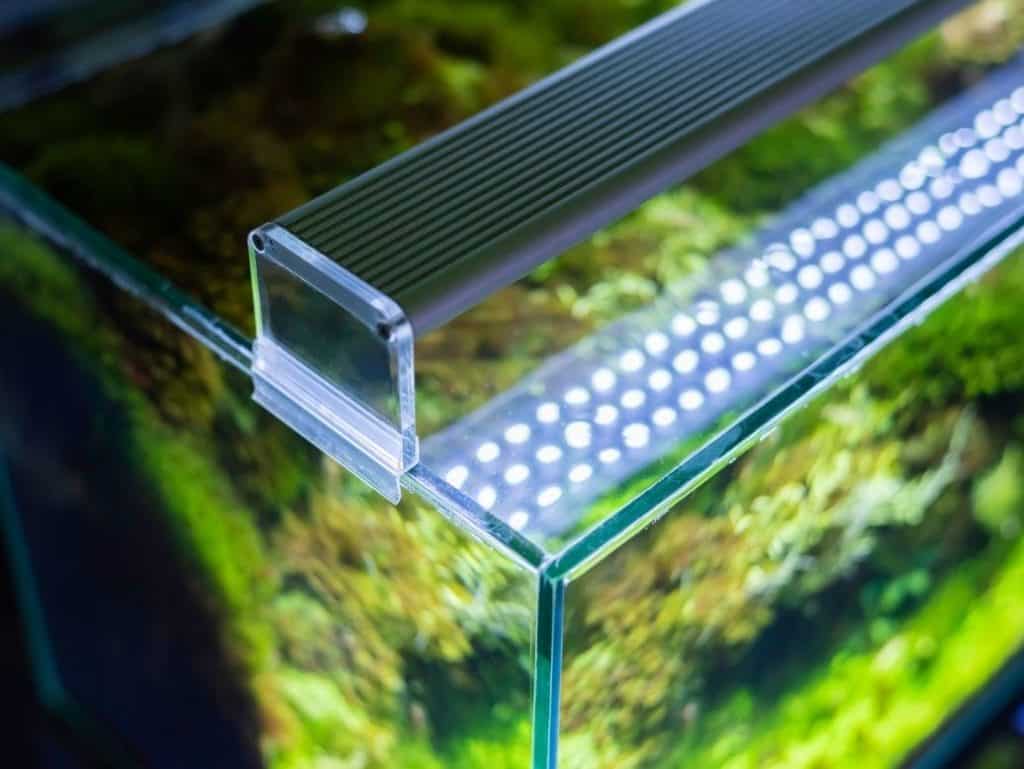
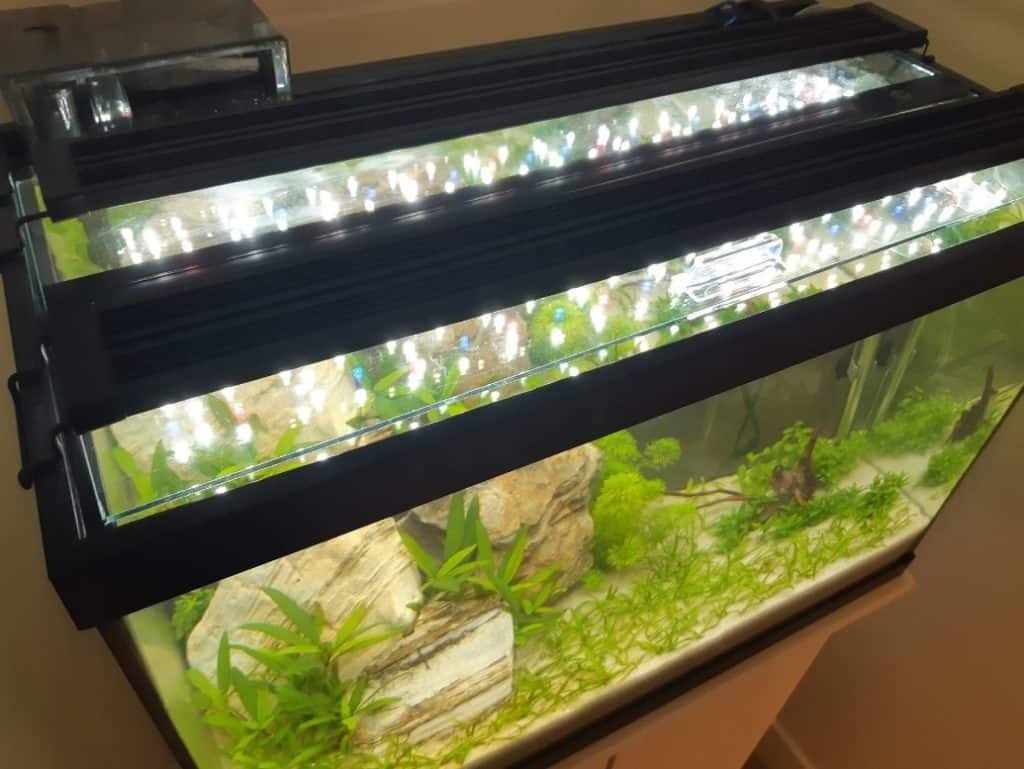
Aquarium kit lights
Many fishkeepers will buy all-in-one kits for 10 or 5-gallon tanks. These kits often include a tank, heater, filter and lighting.
In our experience, the default LEDs that often come in these kits are not quite strong enough to sustain healthy plant life. They look something like this:

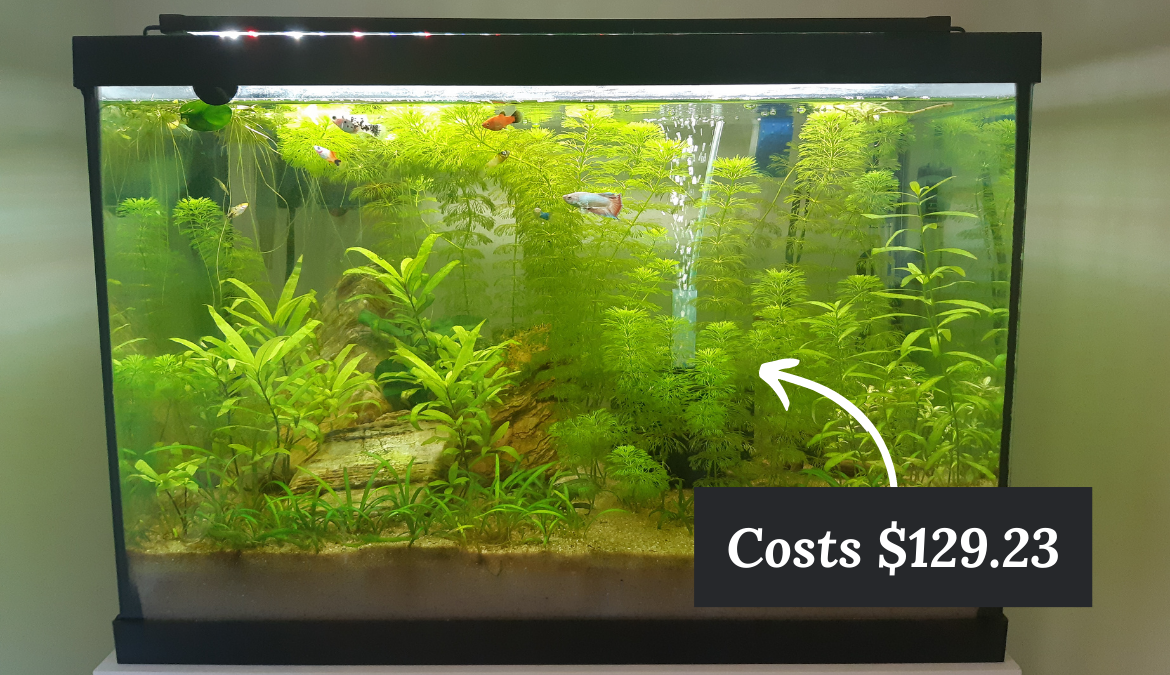
We recommend buying a separate light system. But you don’t need to buy a top-of-the-line product such as a Fluval 3.0, which costs as much as $300.
Instead, a simple mid-level light, such as a NICREW ClassicLED will be more than sufficient for your low-tech needs. You can buy these in the $30-70 range.
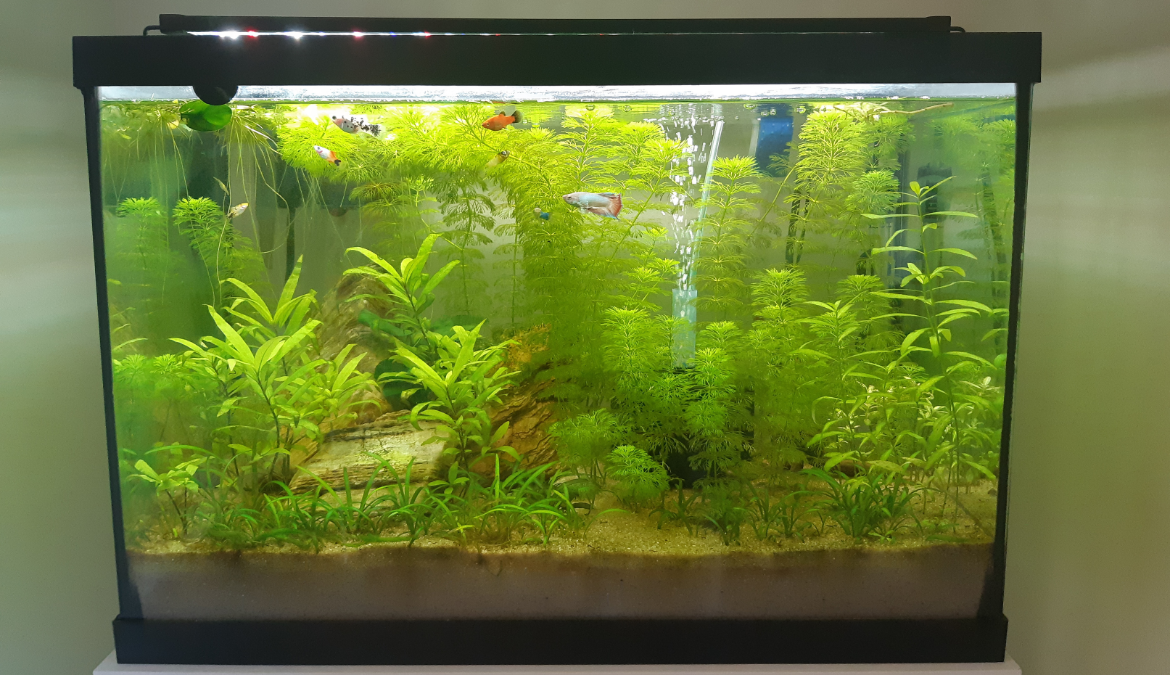
We use a HICREW in our low-tech 10-gallon tank and setup it to about 50% intensity for an 8-hour daily photoperiod. This is using no added CO2 and supplementing both root tabs and all-in-one liquid fertilizer in Seachem Flourite substrate.
Look for a PAR rating above 50 at your substrate depth
PAR stands for photosynthetically active radiation and measures how much light radiation will hit the plants. The PAR value measures how many micromoles of photons hit a one-square-meter of area every second.
The PAR value is measured at a specific distance. Meaning, the closer plants are to a light source, the greater the PAR rating will be.
A PAR of at least 40-50 is perfect low-tech planted tanks.
This means that you should be looking for lighting that will provide a PAR rating of 40-50 at the lowest point in your tank where plants will grow.
For example, the HICREW ClassicLED packaging shows that the light is rated for 70 PAR at a depth of 30cm, or about 12 inches.
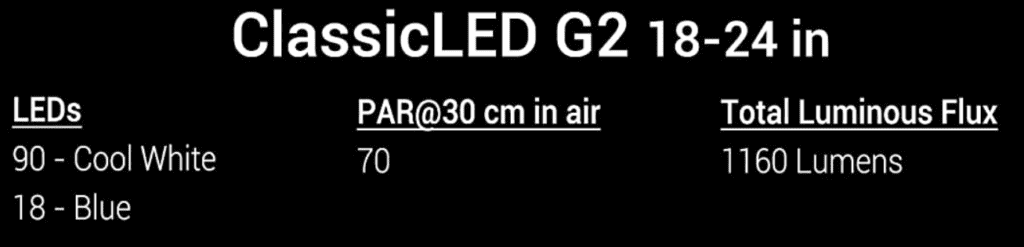
This means that plants 12-inches away from the light will receive 70 PAR of light. However, notice how it says “in air.” This means the PAR rating was measured out of water.
Water will reduce a light’s PAR rating slightly. We estimate by around 10-15% or so. Therefore, we estimate that this HICREW light will provide approximately 60 PAR at 12-inches.
At a depth of 16-inches this light’s PAR may be around 40 or so, which would still be adequate for a low-tech setup. Any deeper and you will likely require a stronger light.
Remember, if you choose to upgrade to a high-tech setup in the future, your plants will require higher PAR levels to match the increased CO2. Therefore, you would need to upgrade your lighting as well. So you may consider buying a higher-end light now that can be adjusted up and down.
But for low-tech tanks, you will have success with most mid-level light brands.
Kelvin
The Kelvin figure simply measures the light temperature that we can see. 5,500-6,500 Kelvin is white light or daylight.
A lower Kelvin value, such as 3,000-5,000K, will appear warmer with more reds. Higher Kelvin will appear cooler with more blues.
5,500-6,500K is generally accepted as the best range for planted tanks because it provides a good mix of red, blue and green colors. All of these colors are good for plant growth.
However, you may choose a warmer color if you want to show of some of the reds and oranges in your tank. Or if you’re trying to achieve a certain aesthetic.
Generally, your low-tech tank will not benefit substantially regardless of which light you choose, so long as it’s reasonably close to a daylight spectrum.
Side note: Saltwater reef aquariums require much cooler colors – as much as 20,000K. This is because red and green light waves do not reach as deep beneath water as blue wavelengths. Therefore, coral have evolved to live off the blue light available on the ocean floor.
How many hours of lighting is required for low-tech tanks?
A photoperiod of 8-12 hours is the most common range for aquarium lighting.
We suggest starting at 8 hours and waiting for two weeks to see if algae blooms start occurring. If little or minimal algae occurs, you can consider increasing to 10-hours.
Low-tech tank maintenance
You might be wondering how to maintain your tank once it’s been set up.
Water changes
Water changes are an important part of any healthy aquarium.
The most important function of a water change is to lower the concentration of nitrates in the water column.
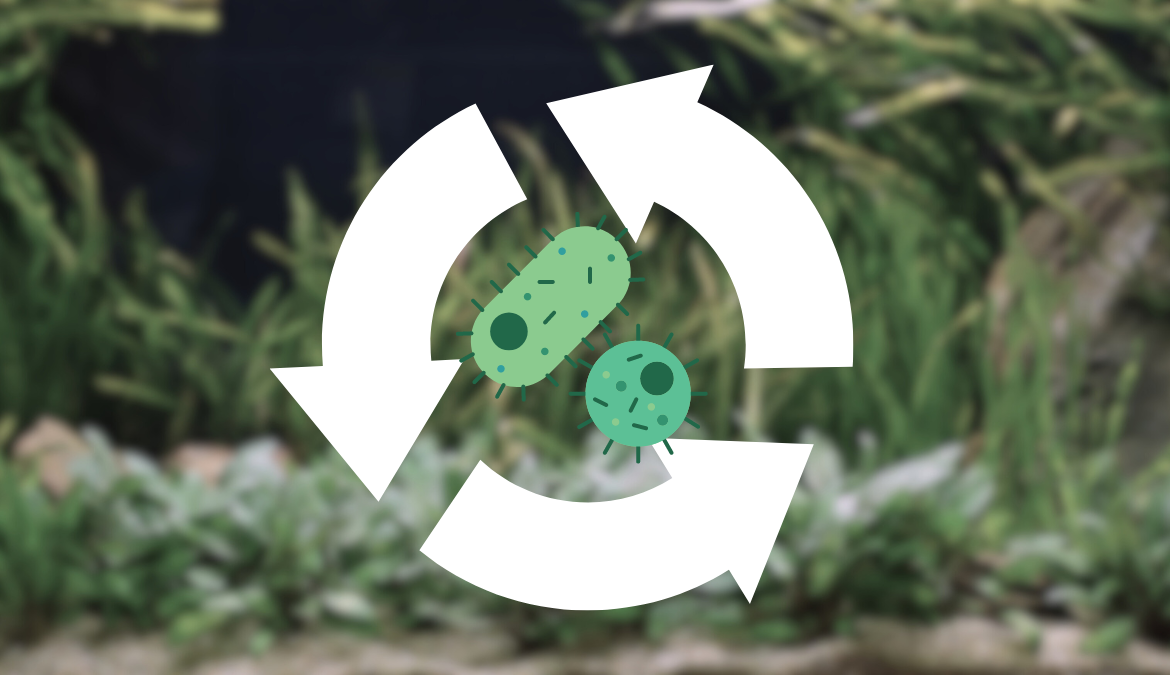
As your fish produce waste and plant leaves die off, they turn into ammonia. This ammonia is then consumed by the tank’s biological bacteria, called Nitrosomonas and Nitrobacter. They convert them into nitrites and then finally nitrates.
These nitrates are consumed by plants, but accumulate in concentrations that become toxic to fish. Between 20-40ppm of nitrate is considered optimal for planted tanks.
Above 40ppm will harm your fish. Therefore, it’s wise to conduct regular water changes to remove excess nitrates.
The frequency a volume of your water changes will depend on the size of your tank, how many fish you have, how much you feed your fish, how much you fertilize and many more factors.
Smaller tanks will accumulate waste more quickly, and will require more frequent water changes.
We recommend committing to weekly water changes. Then determine how big of a water change is required for your setup.
A 10-gallon tank may require a 30-40% water change once per week if you’re dosing liquid fertilization. Otherwise, a 20-25% water change will probably be sufficient.
The best method is to use test strips or a liquid test kit to measure your nitrates. Then conduct water changes when your tank is approaching 40ppm.
Fertilization schedule
Root tab schedule
We recommend adding root tabs once every 3-4 weeks if you’re using an inert substrate, such as gravel, sand or Seachem Flourite.
If you’re using an aqua soil, you likely don’t need root tab supplementation for 6 months to one yea once the substrate has been depleted.
Liquid fertilization schedule
We recommend dosing liquid all-in-one fertilizer in pretty much every planted tank. A good schedule is 1-2 times per week.
The specific dosage will depend on your tank size, plant load and other factors. We suggest following the recommended dosage on your fertilizer packaging and adjusting from there.
For example, We noticed that the recommended dosage of Thrive fertilizer for one of our 10-gallon tanks was one full pump (2ml) twice per week, followed by one 30% weekly water change. This resulted in nitrate levels in excess of 40ppm.
So we instead changed the dosing schedule to a half pump (1ml) twice per week with a weekly 40% water change.
Document everything you add to you tank as well as observations and water test results. Then adjust based on what your specific tank is telling you.
Trimming and propagation
Grow more lush plants by trimming them regularly
Trimming your plants will often cause them to grow back more lush. This is a good practice for new plants to your tank as it may help them establish plant growth that is better adapted to your tank conditions.
Plant trimming may improve nutrient filtration
Plants offer the benefit of removing toxins such as ammonia, nitrite and heavy metals from the water column, which provides safer water conditions for your fish.
But in order to do this your plants need to be able to grow. It is the constant growth of your plants that is most important.
Therefore, if your plants are overgrown and your tank is too crowded, your plants will have difficulty growing and will not be able to absorb nutrients.
Plant trimming removes toxins from your tank
Plants will only absorb a limited amount of toxins from your tank until they’ve reached their capacity. A high concentration of toxins may also create plant growth problems.
Trimming your plants also removes the toxins stored inside the plant tissue, allowing new plant growth to dilute the concentration of toxic build-up.
Propagation helps you achieve a more lush-looking planted tank
Propagation refers to the re-planting of trimmed plant stems and leaves. Although trimming will reduce the size of your plants, re-planting the trimmings will allow twice as many plants to grow in the future.